Showing posts with label teaching kindness. Show all posts

Wednesday, October 30, 2019

In the Art Room: Teaching Kindness and Teamwork

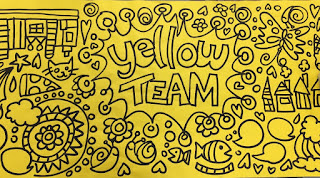
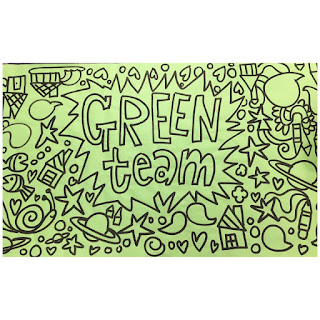
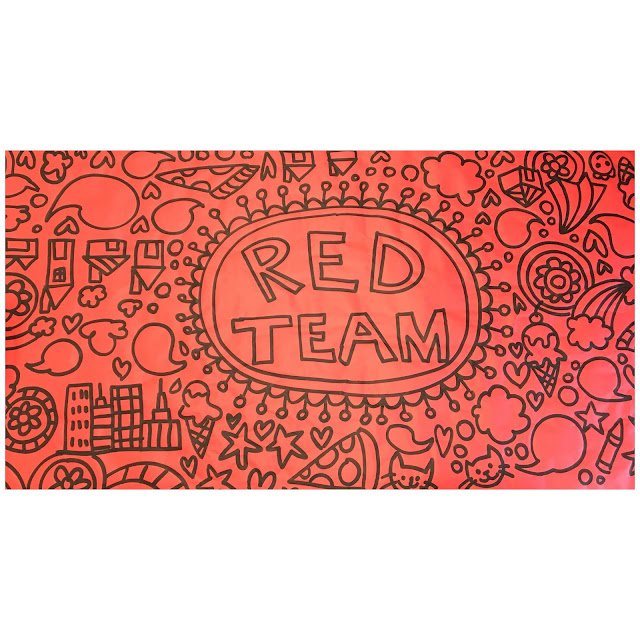
This year, my students sit at "table teams". Typically, I do a red table and an orange table and the rest...but this year, I switched to calling them teams. I've been keeping track of table team points on Class Dojo and it has really been making a difference in behavior. Now, just to be clear, I don't do a Mrs. Smith's Orange Team...instead it's whoever sits at the orange table in the entire school. This makes keeping up with points a whole lot easier. My students can earn points whenever we transition from directions to work, clean up or whatever I see fit (cuz I'm the boss, Applesauce). To encourage a teamwork vibe, I recently created these bingo dauber GIANT table clothes for my students to work on and write kind messages to one another. Here's a video to share some more:
Each of these banners was created with bulletin board paper and my bingo dauber hack. Each dauber is filled with diluted India ink.
Y'all know I love making big banners for my students to color and/or paint. For these, my students will use construction paper crayons.

Since I cover my table clothes with giant messy mats, I think these will make it for quite a while. Thinking of having them laminated so they could make it until the end of the year. I'll keep you posted.


Do you have table teams? How do you inspire teamwork, cooperation and kindness?

Here's hoping my students love them as much as I do! 


 photo signature_zpsd10b3273.png
Read more »

Saturday, January 21, 2017

In the Art Room: Happy Hearts Inspired by Chris Uphues

Hey, friends! Second grade-land has just finished off a fun project with a strong focus on LOVE. My theme this year has been kindness and with Valentine's Day right around the corner, I really wanted to focus on all things love-y. Because, let's face it, the world could use a whole lot more love right now! 
And if these happy hearts don't help spread the love, I don't know what will! 

Another focus this year has been to introduce my students to more contemporary artists and also street artists. During my search, I discovered the artist Chris Uphues and completely fell in love (sorry, I had to) with his work, especially his happy hearts! 
If you aren't familiar, Chris is an artist based out of Chicago whose heart murals can be found there as well as in New York and Los Angeles. When I discovered his work, I was immediately struck by how happy it made me! I knew the colors, energy and joy in his work would really resonate with my students. Y'all should really check out his website...I love that his hearts can be purchased in the form of reasonably priced prints, patches and pins. I've got a cart full! 
I would totally cover a wall in my house in these! I mean, who wouldn't?! 
For the Happy Hearts pieces that my second graders created, we used the following:

Day 1:
* Black and white paper, 12" X 18"
* Tag board heart stampers
* Paint in yellow, magenta and turquoise

Day 2-3: 
* Painted papers, construction paper, scrap papers for hearts
* White paper for eyes
* Black paint
* Scissors and glue
Day 1:

I see my second grade kiddos for 30 minutes, twice a week. On our first day together, we chatted about Chris and his work. I introduced the kids to printing and we printed a black paper and a white paper full of hearts. To see how the heart stampers were created, watch the first 5 minutes of this video
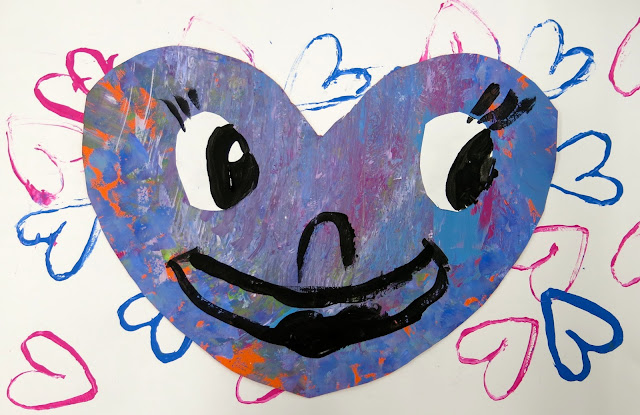
On day 2, students learned how to cut out hearts. Many students knew how to do this already...but I had several that didn't. This was a great introduction to symmetry! I also offered them oval, circle and other shaped templates for the eyes. Once those were glued down, black paint was available for the artists to paint the faces. I had printed off several sheets of Chris' hearts to give the kids ideas for expressions. 
By the end of the second day, we had a ton of these! I love how happy and fun they are. 
Over the next couple art classes, the kids created more hearts and began adding them to the printed backgrounds. They so enjoyed creating these expressive heart faced characters. This project was a huge hit with them! 
Each kid was super engaged in creating their heart collages. When I told them that we'd be moving on to another project next week, each class shouted "WHY?!" They couldn't stop making these hearts! I just might have to give them one more day to keep on heartin'. 
As they worked, the kids had stories about each heart and how they interacted with each other. We had heart moms, dads, babies, grandparents, you name it! 
As they worked, the kids laughed at their hearts, showed them off to friends and pulled ideas from one another. 
Before gluing, we did chat about composition, overlapping, emphasis and scale. I wanted to remind the kids of these thoughts as they worked...but made sure not to weigh in too much as I really wanted to see where their ideas would take them. 
 Because, I mean...look at how fun and funny they are!
I'm so looking forward to showcasing these throughout our school along with all of our other LOVE-based projects. Just a quick scroll through this blog and you'll find half a dozen love-based projects we are currently working on in the art room. 
The best part is, I've tagged Chris Uphues on several posts showcasing the kids' hearts on my Instagram and he's been so sweet to respond! The kids have loved hearing his positive feedback. 
It's made us feel all...happy! Like this. 
 
If you are looking for a fun lesson for your students that introduces printing, symmetry, expression, collage and the amazing contemporary artist Chris Uphues, I strongly recommend this fun lesson! Love to hear from you if you give it a go!
 photo signature_zpsd10b3273.png
Read more »

Monday, December 19, 2016

In the Art Room: Rizzi-Inspired Love Birds

With winter break right around the corner, I'm thinking ahead (for once!) about the projects my students will be working on come January. We are experiencing a break down in behavior in my classes of older students (nothing major, just more chattiness and lack of focus than what I'm used to) so we'll be returning to our start-of-the-school year chat about rules and routines. But I do want my students to still feel the love! So I'm putting together some love-themed projects for all of my classes. This here Rizzi-inspired Love Birds for my third graders is my first installment. 
Lots of focus on vocabulary in this lesson. This project will really help us explore creating a gradation, mixing tints and shades, discovering value and that's just on the first day! From there, we'll be working on creating a composition of our choice. I'm excited to see what my students create when we start these next month.
I have noticed my kids respond really well to Rizzi and his colorful works of art. A couple of my third grade classes are working on large-scale Rizzi-inspired buildings to create a city. I'll be certain to share them in an upcoming post.
Rizzi's landscapes often features a gradation of light to blue as he often will have day and night in his work. I thought this would be a great tie in and give the kids a chance to learn how to create a gradation.
Aren't his bird pieces so fun and happy? 
My biggest concern with kids creating at this age is that they do not draw large enough. Such is the reason I provided a guided-drawing activity for them in the video. This will help them understand the scale at which they are to create the most impact.
Do you have some favorite Valentine's Day/Celebration of Love projects? I'd love to hear about them. And if you give this lesson a go, please let me know!


 photo signature_zpsd10b3273.png
Read more »

Monday, October 17, 2016

In the Art Room: You Be You Mural Complete!

So, like, at the end of August, I shared with you my You Be You lesson inspired by the wonderful book of the same title by Linda Kranz. I did this project as apart of our kindness and growth mindsets theme with my first through third grade kids. It was fun, easy and a great way to reintroduce the elements of art as well as drive home some super positive warm fuzzies. 
Unfortunately, I suffer from a serious case of Squirrel-itis and got sidetracked from assembling this mural. However, right before Fall Break Eve, I conned my special area buddies into "helping me" with the mural (two hours later, my friend Ali was still glueing and outlining the fish in blue...thanks, buddy!) and getting it up on the wall. Yay! Another Mammoth Mural in the books.  
In case you wanna give this fun lesson a go, feel free to use the video. You are always more than welcome to use any of my videos in your art room. I try to update weekly (with an Art Teacherin' 101 going up every Wednesday-ish). If you subscribe, you can stay tuned. 
So...true fax: this mural was only supposed to be a You Be You tribute...but with so many fish created, I had to create a second mural. This one with the title of Linda's first book in the series. By the way, when the murals went up, the edges just felt a little meh. I picked up that cute border at Joann's and added it today. I think it makes a big difference. 
Right after the mural was hung...I discovered another bin of third grade fish sitting there all, "hey there, forget something, Stephens?" Looks like I have more fish to add to the mural!
When I have my students create large murals, we usually create huge sheets of pattern papers. We call this our Painting Party. I throw papers down on the tables and either I'll start a pattern motif of the kids will. They are to repeat that pattern until their paper is full. Once complete, I remove the paper and replace it with another large sheet. This gives me a nice big stack of fun papers to use when assembling the kid's murals. 
First grade fishes just swimmin' and swimmin'. 
After the murals were hung, I realized just how much our school walls (and ceiling!) are devoted to the artistry of our awesome kids. I think it's vital to showcase ALL student artwork (not just a hand selected few) for several reasons: 1. It tells your students that "Hey! You are awesome! Your artwork is amazing! You deserve to be seen by all!"; 2. It showcases your art program and the importance of the arts to your parents, faculty and staff. This is just one small nook that is full of their work from this year! You can see more of their monochromatic selfie mural and the fourth graders' radial prints
I think my favorite part of this mural is the message. I'm a big believer in you doing you. It took me entirely too long to really listen to my inner voice. I have spent a good portion of my life doing what I thought I was "supposed" to be doing and being the person who I thought I was "supposed" to be. Letting go of that notion and really being comfortable with who I am, what my interests are and where that takes me is now the place I find myself. I want my kids to get there faster than I did. I want them to know it's awesome to be who they are cuz There Is Only One You so You Be You! 

Thank you, Linda Kranz, for the powerful message!
 photo signature_zpsd10b3273.png
Read more »

Sunday, September 25, 2016

In the Art Room: Kelsey Montague-Inspired Mural

Ohhhh, y'all. I'm so excited about this collaborative mural that started out as a sub plan. Allow me to share with you our What Lifts You mural! That sweet face above is my assistant principal's son, Carson. 
And here's his sweet mama! Her pose makes me so happy and excited about this project. Lemme tell you all about our inspiration. 
Street art is becoming very popular in the art world. What I love about it is that it is accessible to everyone. Kelsey Montague has taken her street art to the next level by making it interactive. She's also inspired folks to think about #whatliftsyou. I love everything about Kelsey's murals: the beauty, the message and the interaction. 
She recently created a street mural in Nashville! The most amazing thing is that her murals are created in paint pens. That's right. Tons of paint pens, y'all. Time to invest in some stock. 
I wanted each of my students to contribute to the mural. Knowing that I was going to be out for a couple of days, I created a simple sub video that introduced my kids to Kelsey, got them reviewing and applying the elements of art and kept them creating. I was THRILLED to come back to school to these beauties!

Because of my 30 minute class time for my younger students, many did not finish in one class. So our first order of business when I returned was for the feathers to get finished and cut out. My early finishers then began working on the patterned papers that would also contribute to the wings. 
I love having the kids create giant sheets of patterned papers. I just throw a huge piece of bulletin board paper onto the table. Sometimes, I'll ask the kids to tell me a pattern or shape they'd like to repeat...and then tell them to go for it. Other times, I'll have a pattern started for them. You can see examples of murals with patterned papers here in our Dot Day project, in this winter collaborative, in this Village of Kindness project and in this Rousseau-inspired tiger mural
The left over papers are going to come in handy this week as we also complete our You Be You mural.
I really wanted the mural up by Monday because we are starting our Growth Mindsets in the art room then. More on that soon (including a book club, stay tuned!). That being said, I did have to hustle to get it complete. I stayed after school on Thursday taping four 12' sheets of bulletin board paper together for the black background. Then, in chalk, I lightly drew the general shape of the tip of the wing. 
Then I just started playing. I knew that I wanted their wings to be broken up a bit by the patterned papers but I wasn't sure how. Once I got a general idea, I started to hot glue things in place. 
I arrived at school at 6am on Friday morning because I was so excited to get it complete and up on the wall! I tacked down just the top of the papers so that I could lift the paper and slide the feathers underneath. I have about 400 students. Not all feathers are complete and up...but most are. I left room on the left side of the wing to add the final feathers. Once everything was glued, I outlined the top of the wing in white paint. I also added white outlines to the patterned papers. 
Back to that book I mentioned. The premise of the book is getting the kids to think beyond their "fixed" mindset that they can't do something...and change that thought into believing that they can.  Such a powerful message, don't you think? To kick things off, during art class, each of my students (as well as faculty and staff, I hope!) will get their photo taken in front of the mural. They will also write about what lifts them as that's the big idea behind Kelsey's murals. Keeping that positivity in mind, we will focus on our growth mindset. I will be sharing more on that lesson VERY soon! 
 But for now, let's get closer to these wings. 
 I only glued the "quill" of the feather down so that the feathers would have a ruffly texture to them. 
When I snap the photos next week, my husband suggested taping an X on the floor so the kids would know where to stand. Such a smart dude. 
 I'm super stoked! This was finally hung in the afternoon on Friday when my specials team buddies were free to help me hold it up and glue it to the wall. 
 To give you an idea on size. The photos I take of the kids will be hung along the wall beside the wings. 
 As soon as the wings were up, folks were ready to have their photos taken! Here is my friend Kiera who you might know as Cleopatra
My principal's sweet son, Ashton! 
 One of our P.E. teachers who you might know as King Tut (as well as Frida and Grant Wood, ha!). 
 My awesome principal and her sweet kiddos. I am super lucky to have the most supportive admins in the land. 
 Dawww, that face!
Our super enrichment teacher who is always kind enough to let me use this wall outside of her room...thank you, Ashley!
Y'all know I had to join in on the fun. BIG shout out to Kelsey Montague for the inspiration and my special area friends for helping me hang this beast. All y'all are what lifts me!
 photo signature_zpsd10b3273.png
Read more »