Showing posts sorted by relevance for query weaving. Sort by date Show all posts

Monday, January 14, 2019

In the Art Room: Top 14 Favorite Valentine's Day Lessons

Well, hello lovies! In this blog post, I thought I'd share with you 14 of my very favorite Valentine's Day inspired lessons...perfect for these chilly and cold months. Let's let warm fuzzies abound in the art room! 

To find the lessons, just follow the link. Many of them have a video to share with your kids. Also...several of them are sub plan videos! Perfect if you have to take a day. I know I could use one. 
First up are these sweet Jim Dine-inspired heart sculptures created by my second graders. We used Celluclay and aluminum foil to make these beauties and the kids loved making them. 
Next up are these amazing LOVE prints created by my first graders. We chatted about Robert Indiana before diving into these. We had a whole lotta printmaking fun with this one. 

Last year, I did this lesson with my second graders. They were able to choose their own "kind" four letter word (we had: nice, kind, love, glow, hope, good, etc.) and used strips of paper to create the letters. Those turned out so fun. 
First grade artists created these huge Romero Britto-inspired hearts last year with bleeding tissue paper and paint sticks. We made these on huge 18" square sheets of paper. 
Speaking of first grade, here's a peak at what mine are working on right now...weaving! Heart weavings that we'll put together to create a faux quilt. This is one of my favorite lessons but mostly because I do love to teach weaving. 
Chris Uphues is one of my very favorite contemporary artists to share with my kids because 1. he's the nicest and 2. his artwork speaks to them. It's so happy! My students adored this lesson a couple years ago! 
If you need a quick one-day lesson that will introduce your kids to a new artist, you might want to try this one on for size. It's inspired by J. Goldcrown and all you need is black paper and chalk for amazing results. 
One year, we were inspired by Peter Anton's fake food sculptures to make some box of chocolates of our own. Third grade thought this was the coolest project ever. 
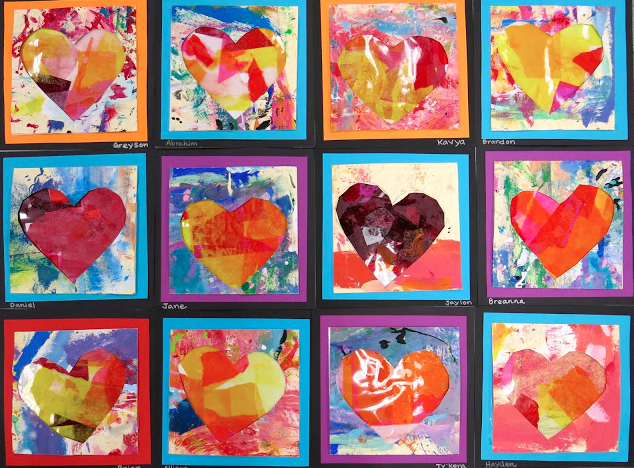
If you are like me, you do long art lessons...and then need a shorter one to pick up momentum again. I think my students might be the same way. This lesson is a quicker with beautiful results. Here's what we did with the paper after we cut the hearts how: filled them with a video of tissue paper!
And here's what we did with the hearts we cut out. So cute, right? 
This lesson is similar to the first I shared except that there are wings added with plaster. I'm thinking of doing this lesson with my third graders super soon...just need to work out the specifics...but I'm sure they will love it. Video details and more here. 
Need a sub plan? I did this Romero Britto inspired collaborative with my kids when I was out on jury duty. Lesson and video right here. 
Need something big and happy to spread the love? My kids EACH contributed to the Our School has Heart mural. Visit this post to see what each different grade level created for this mural from embroidery to painting to sculpture and needle felting! 
My fourth graders tackled this lesson a couple years ago right after they finished the following sculpture lesson...
Boy did we have a ball with this lesson! A super fun sculpture project for the kiddos. 
This lesson I created a little while back for my kindergarten and first graders. We loved the printed hearts and the fun guided drawing animals. Video lessons for each critter. 
Looking for a fun way to introduce your kids to four contemporary artists who use hearts in their work? This video lesson just might be for you!

Oh! And if you are looking for something to do with your faculty and staff to bring the love, you might want to check out these our Clay Hearts with Wings...a huge hit with my coworkers. Video too!

Okay, y'all...that was WAY more than 14 projects so have fun! 

 photo signature_zpsd10b3273.png

Wednesday, February 25, 2015

In the Art Room: A Scrap Yarn Relief by Second Grade

A while back, when my second grade was working on the Ojo de Dios, our lil table top trash cans were becoming filled to the brim with yarn scraps. When I asked a student to empty the trash cans and throw away the yarn, the kid paused, looked at me and said, "What?! Throw all of this pretty yarn away? BUT WE NEVER THROW ANYTHING AWAY IN HERE."

Okay. So I may or may not have created mini-hoardering monsters. They learn from the best, what I can I say?
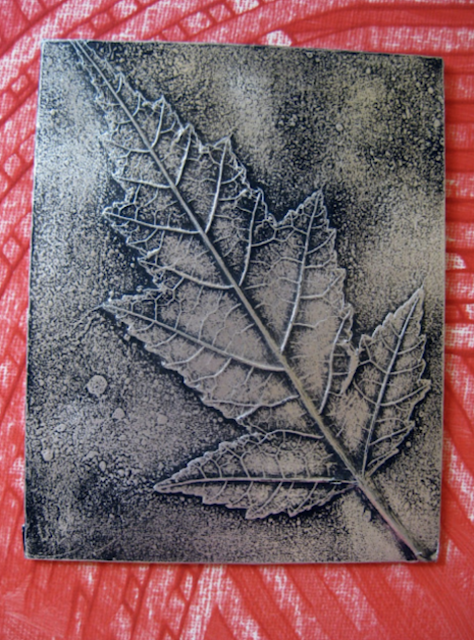
After the kids planted the seed of creating with our scrap yarn, I began to give it some thought. It was then that I thought a lil foil relief project might be just the thing. This project was quick, easy, environmentally friendly and tied in with our year long study of Mexico.
 Here are the supplies we used:

* Matte board cut into 6" X 6" squares
* Scrap yarn
* Cheapo foil
* Spray adhesive. I like 3M the best.
* Super cheapo black matte spray paint. I buy the $1 a can junk.
* 000 steel wool
* Sharpies
* Tempra paint
* Matte board for the frame 8" X 8"

To start this lesson off, we read The Legend of the Poinsettia by Tomie de Paola. We did start this project before the holidays so it was a great tie-in. Each student was given a 6" X 6" piece of matte board that had been sprayed with a light shower of spray adhesive. At their seat, the students were to create a miniature still life of a poinsettia. Once finished, they brought the board to me where I hit it with another shower of adhesive and placed a piece of foil on top. At their seats, the students used their finger tips to "massage" the foil and reveal their yarn design.

 The following art class, I had spray painted their design and passed it back to them. It looked a lil like this:
 Using the finest of steel wool, the kids took to burnishing off the spray paint and revealing their design. 
This was then given a wipe down with a tissue to remove any spray paint dust. From there, the kids used Sharpies to add some color to their masterpiece.
 Most of them chose to color on the raised areas which was fine with me. Some decided to color the entire piece which was cool...but did not make for a happy Sharpie. 
 I love the tulip look of the flowers in this pot.
In the story, the young girl is helping her mother weave a new blanket. We looked carefully at some examples of Mexican blankets that I brought in and then began the second phase of our project. On our first day, we simply painted a variety of thick and thin lines in different values of color on our 8" X 8" board.
The following art class, the kids learned how to create different patterns in their painting by printing with cardboard. They loved experimenting with different designs. I loved these so much I was kinda sad to see 'em covered by their metal pieces!
This project was so easy and fun and I totes loved the results. I keep thinking of other ideas for this kind of project. Like if the kids learn about Picasso, they can create a yarn-y abstract portrait. Or maybe a cool landscape that is continued onto the frame of the piece. So many ideas! Do you have any that spring to mind?
Our next unit of study is circle loom weaving which you know I love. The kids have already started to paint their plates which have a similar design as these painted frames. This also proved to be great because we gained some experience in color mixing and pattern making before diving into our plate painting for the circle loom weaving project
 Whatcha think, would you give this a go?
I promise your students would love it! AND moral of this story: Not throwing anything away, even bits of scrap yarn, can yield some pretty fantastical results. Until next time, y'all!

 photo signature_zpsd10b3273.png

Tuesday, August 6, 2019

Fiber Arts Craft Nights!


To celebrate the release of my book Stitch and String Lab for Kids, I thought I'd bring back my Facebook and Instagram  LIVE nights (click the link to follow my FB page or IG account). I ran this past y'all a while back on my Instagram and it was met with a resounding YES...which made me so happy. I love doing live craft nights. I fell off the wagon last year when I was writing the book...now I have a little more free time to start it back up again! The beauty of the live craft nights is that FB archives them so you can always join the fun at a later date and time. 

I said I'd give you all a supply list for the nights...here you go! So take a screen shot so you remember what to have on hand. I tried to think of things you may already have so you wouldn't have to go out and purchase anything. All of these crafts we will be doing are also from my book!  
We'll be doing two crafts on the first night! One to prepare the fabric that we'll use the following week. This way of dying fabric was one I discovered while creating my book and I think you are gonna love it. Then I'll be sharing a simple embroidery for you to do with your students. We'll be doing that on Wednesday, August 14th. 
The following week, we'll be using that dyed fabric to make a stuffed pillow! If you don't use your dyed fabric, any ole fabric can be used. I'll be walking you through the steps of sewing as I share it with my students. This way you can see how I teach them how to thread a needle, stitch and tie a knot. I'll also be sharing how to make tassels that week. 
The final week, I'll be sharing with you how to create a cord weaving and how to make pompoms. Cord weaving is a HUGE hit with my students. They absolutely love it and it's one of my favorite things to teach. We use them to add a strap to our woven pouches. I'll also share with you a super easy way to make pom poms -- no special tools required!
 I'm so excited and I do hope you'll join the fun!
ALSO, IMPORTANT ANNOUNCEMENT! There has been date change to my book launch at Parnassus Books in Nashville. It is now on Sunday, September 15th at 2pm. If you would like to attend (and I would love to see you there!), please RSVP here!
 photo signature_zpsd10b3273.png

Tuesday, September 12, 2023

14 of My Favorite Fall Art Lessons

It's officially my favorite time of the year: FALL! I love it mostly because I'm super into Halloween and all things spooky. I also love that the days are finally cooler...but I do hate that I have less daylight time. Regardless! Fall's my fave and this here post is full of my fave fall art lessons...

AND, like usual, these lessons are free and if you tap the link, you'll be lead to the lesson post which has all the details and (usually) a video for you to share with your students. 

So...here you have it: My Favorite Fall Art Lessons!
Let's kick things off with this Van Gogh-inspired haunted house! My students, especially my older ones, LOVE making spooky drawings. All the details can be found right here.
Who doesn't love MONSTERS for this spooky season?! I've got several in this blog post, starting with this one. I created this as a sub plan and my sub and kids loved it! Full video lesson here. 
This lesson was one I came up with years ago that I love doing with my third graders and up! Weaving is always a hit. Here's the video lesson here. AND a book I wrote with all sorts of fibers lessons like this one. 
Can you believe this is first grade?! I KNOW! Lesson with video and contemporary artist connection here!
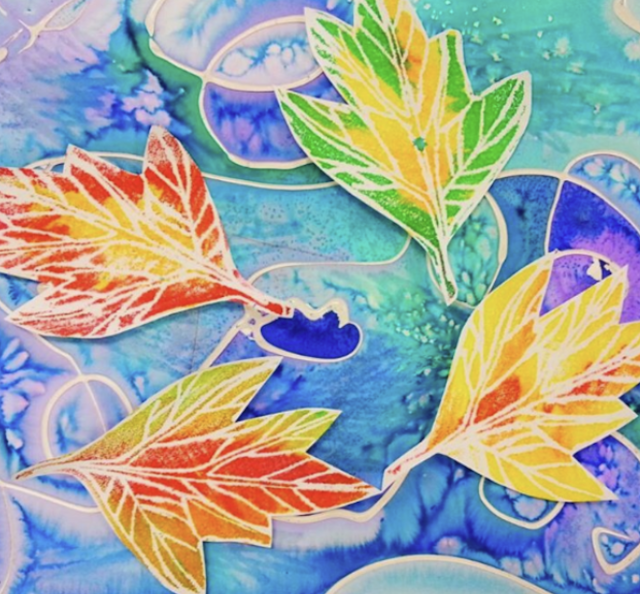
I always do paper weaving with first grade and sometimes second graders at the start of the school year. This one is always a favorite. All the details here!
These leaves are PRINTED...with markers! An easy and fun printmaking activity that you can find out all the details about here. Complete with lesson video. 
Sunflowers are perfect this time of year. You can find tons of these flowers at Dollar Tree and they are perfect for making these Andy Warhol-inspired prints. 
One of my favorite things for this time of year: BLACK LIGHT. It's spooky and fun and the kids LOVE it! This lesson on monsters where we used neon paint and oil pastels was a hit with my fourth graders. Lesson and video here. 
Need a collage and shape lesson? WITH contemporary artists connections? Here you go!
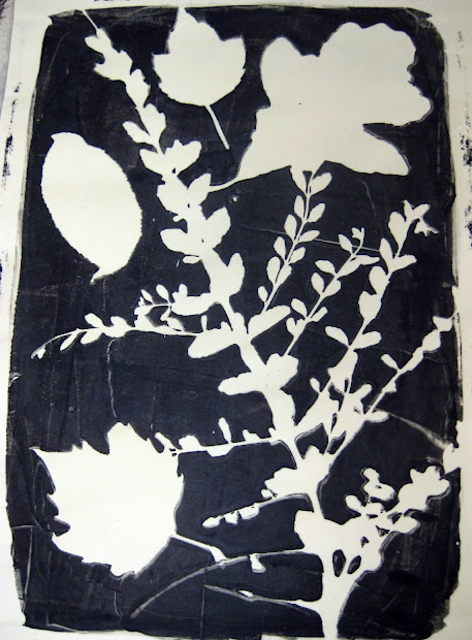
Back in olden times, we didn't have these fancy things called Gelli-Plates. No, y'all, we had to make our own! And I share how in this post but...I wouldn't recommend it. It's not vegan-friendly. It's labor-intensive. And they don't last very long. So...splurge on those gelli-plates cuz you can still do this process!

Fall is the perfect time to paint landscapes! Here's an oldie (this lesson is almost 10 years old!) but one that I still love. 
Y'all, talk about a throwback: this lesson is from 2012! But it's one I have done for years because the results are always amazing. Check it out!
Do you have a class that's jsut ahead of the rest for some reason?! Need a fun lesson that they'll love? Here you go, video included!

I'll have more Halloween-ie lessons coming at you next week but until then...here's a fun collage project I know your kids will enjoy!


photo signature_zpsd10b3273.png