Showing posts sorted by date for query grade 2. Sort by relevance Show all posts

Tuesday, October 14, 2025

Sunflower Still Life Collage


Hey friends! Today I'm sharing with you a fun sunflower still life lesson that is the perfect review for lines and shapes...while introducting collage and monoprinting! This lesson is perfect for your 1st grade and up...and I'm going to share with you a bunch of alternative art supplies just in case you are on a cart or don't have the supplies I am using on hand. So, like many of my videos of late, I'll walk you through a 'teacher talk' at the start of the video to help you think through how you can best make this lesson work for you. Here you go:
Before we dive in, I do want to share...my book, Art Teacherin' 101, has been sold out for the last month. I'm happy to say that I now have it back in stock! If you have been waiting to get a copy or just want to find out more details on my book, you can find it here. 
I'm so excited that my book has sold 10K copies! It's so amazing to think that I've been able to share with so many incredible art teachers. A big thanks if you have ordered a copy! And...just so you know...I sign all copies before packing them up. That's right...my books are packed and sold by yours truly. I'm an independent book publisher and seller. If you ever have any questions about that, feel free to reach out! 

And now...back to the lesson:
To begin, I used my tempera paint filled bingo daubers! You can pick up your empty daubers here.  And my preferred paint (and supplies) are here.

Knowing that not everyone has bingo daubers or the time to fill them, in the video, I share a couple of alternatives. Students could use tempera sticks to create their line papers or...they could paint the lines! So even if you are on a cart or short on supplies, I got you.
This lesson could be done on 9" X 12" paper as the final result or, my preference, 12" X 18" paper. I like the larger format only because it allowed more room for the bigger flower prints. 

For the flower prints, I would recommend using a pizza pan. I got a class set at Dollar Tree for $1.25 each and use them ALL THE TIME. We print on them so much! 
By the way, if you are new to using tempera paint with students and are looking for some pointers, I got you covered right here!
I would split this lesson into three days: 

Day #1: Creating the line papers! Do a Line Review with my friend Larry the Line, of course!
Day #2: Flower Printing! You could include a shape review here! In the video, I talk about both organic and geometric shapes. Alfred the Ape Knows his Shapes would come in handy here!
Day #3: Collage it all together! On the final days of this lesson, it's time to create a collage! If students need a reminder on how to use their scissors and glue...well, I think I can help!
AND...if you are looking for a way to have a Calm and Focused art class, you may want to check out my tips here...and my book that kids LOVE to hear while they work...here!

Have a great week, friends!


photo signature_zpsd10b3273.png

Sunday, December 31, 2023

25 of my Favorite Lessons for Celebrating Love!

Hello, beautiful humans!

Today I'm sharing my 25 Favorite Valentines/Love-Themed art lessons! From sub plans with handouts to clay and plaster projects, I've got something for everyone...including printmaking with kindergarten! Most of these lessons include kid-friendly videos, some have handouts and all are FREE! I hope you enjoy and...

Happy New Year!

I know next week means heading back to school...and it's just so hard to do after weeks off. I thought I'd try and ease the sting a little by offering up to you my favorite fun and easy lessons for celebrating LOVE as Valentine's Day is on the horizon. It's never too soon to start those Valentine's themed lessons and NEVER NOT a great opportunity to celebrate all things lovey dovey. Many of these lessons here come with a kid-friendly how-to video and, best of all, they're free! Just tap the highlighted link for more!

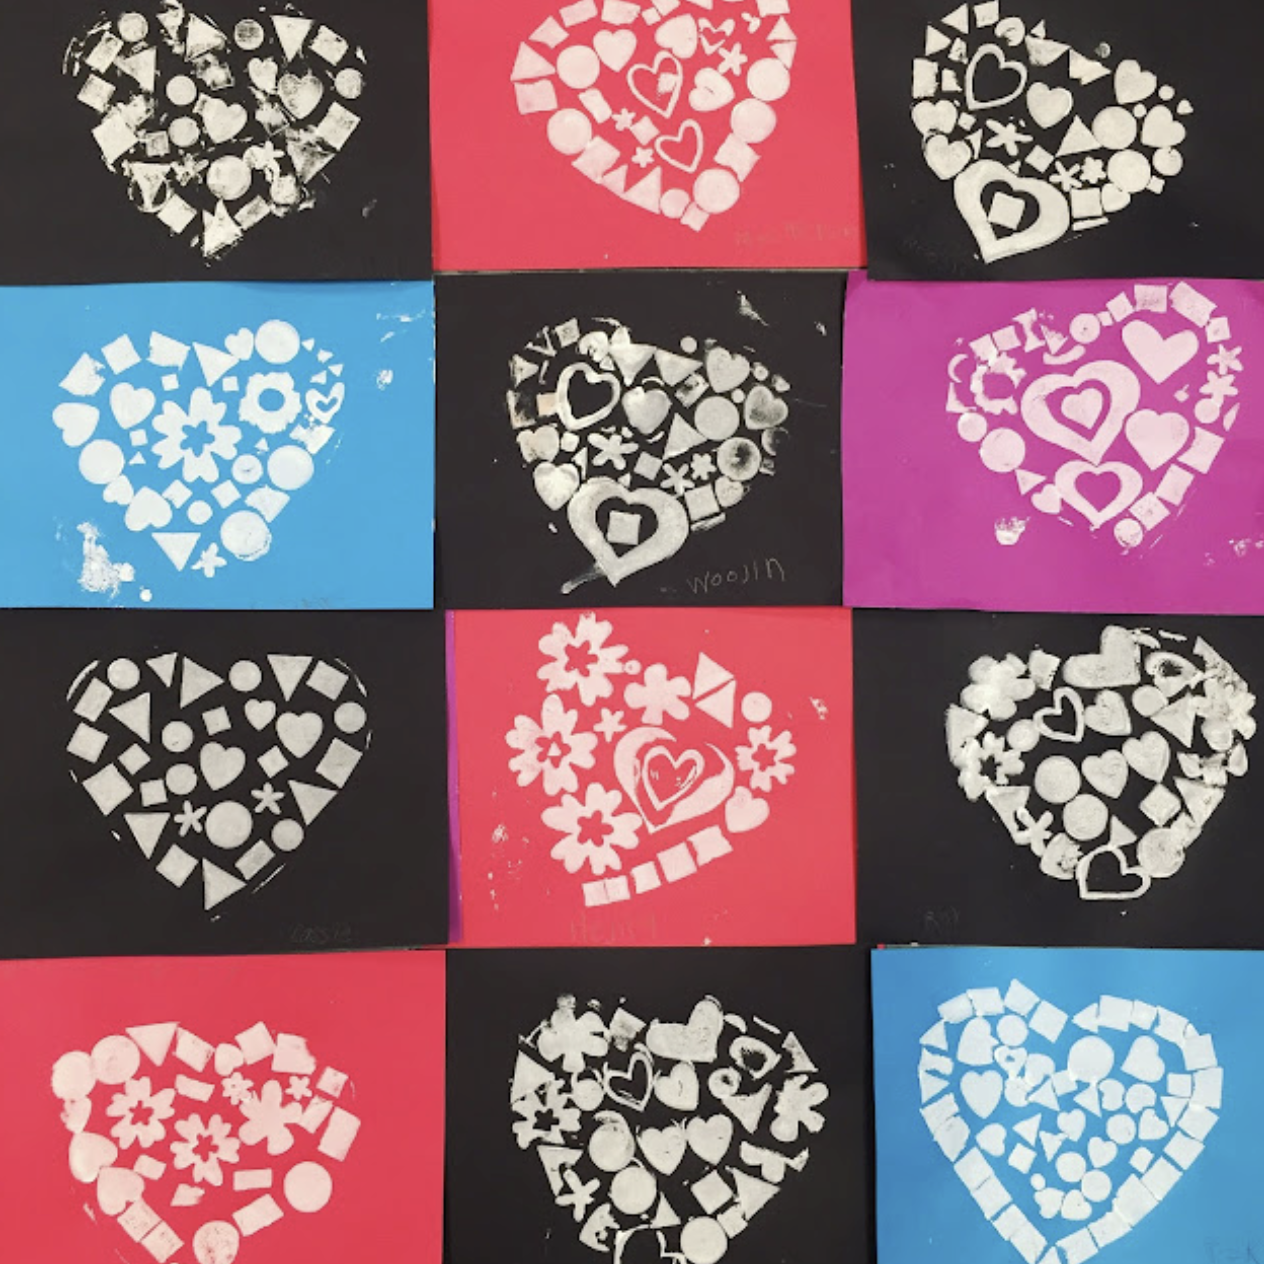
The above is a lesson I created for my kindergarten friends but it was so fun that I ended up doing it with several grade levels. It's that time of year when you really just wanna ease on back into art teacherin', right? So why not do so with a project where you just gotta get out one art supply (tempera paint and black oil pastels) and call it a day? It's much more relaxing that way...and when you are happy and relaxed, it will reflect in your teaching (and, hopefully, the students). 
One of my all-time favorite things to teach first grade is...paper weaving! And I know what some of you may be thinking: SERIOUSLY?! Yes...because I got it down to a science! They make the looms, we weave together on a big loom I created, we do this on the floor and help one another...it's so fun! Here's the full lesson!
Nearly all of these lessons here are inspired by artists! Which means that students learn a little about both contemporary artists as well as artists of the past with these projects. Here we learned about Jen Stark!
For me, back to school after a long break meant back to the basics...a review of rules, routines and expectations. I cover all of that in my book Art Teacherin' 101...it's always a good time to get a handle on classroom management. No matter how could it is, it could ALWAYS be better, right? I share all of my tips and tricks in that book, if you are interested!

With that being said, I often just used simple supplies like markers when we return to school. But 'just markers' doesn't mean you can't do something super cool! Check out the video here on how we created these optical illusion hearts!
Of course, sometimes it's fun to just jump right back in with big and exciting projects! I've been all about the plaster and Celluclay in my own artwork lately...and kids do love it! More here.
Of course, back to school usually means PD meetings. One year, I convinced my admin to let me lead a workshop on creating these clay hearts with wings! I loved doing workshops with my faculty. It was a fun way to get everyone together in a relaxed way (which we never seem to do!) and enjoy creating and each other's company. To teach such a large group, I created a how-to video. 
As you know, teachers are some of the worst students (I'd insert a laugh emoji but we all know it's true!) so having a pre-recorded video will help!
I've never met a kid who didn't LOVE printmaking! But it can be daunting and super messy...which means a lot of clean up for us. However...you CAN do printmaking with just markers and Styrofoam. Let me show you how we made these!
This lesson is probably one of my most popular Valentine's projects! I show you how to draw each of these cuties in videos you can find here. 
I'll also show you how to make easy heart stamps with scraps!
Wanna make these?! My fourth graders loved creating these giant candy hearts! I created a video for them (and you!) here. 
Wow! Did we LOVE creating these (see what I did there?!) And I have an easy method for you to make each one successful. You can check it out here!
This is a project I did with my second graders and they loved it! You can check out the video tutorial and lesson details right here!
Here's a fun lesson I put together to do in one class period! Well, for me, it took 2 classes as my class period is 30 minutes long. I did this with my fourth graders as a way to introduce them to four different artists...in one lesson! Check it out here.
Did we have fun with this one! We used old candy heart boxes and plaster to create our own faux chocolates. We also used tagboard and newspaper to create our candy boxes. It was so stinkin' fun. Full lesson here. 
Look how realistic! Did I mention we used puffy paint?! Everything is better with puffy paint.
I really like to work big with my students. The bigger the paper, the better! It's a challenge with storage...but it's so worth it. These hearts were created on huge squares of paper. We chatted about Britto and did a line review...
Speaking of line...if you need a book to teach (or review) line with your students, did you hear I wrote a children's book!? Yep! it's called Larry the Line. If you are familiar with my Larry the Line poem, let me tell you this is the longer more in-depth version with idea sheets to be printed and shared in the back! You can pick up a copy here. 
Big thanks to all of you that have purchased a copy and left a review! 83 5-star reviews is so amazing! Thank you all so much for the love and support. Okay, back to the lessons...
Another super popular lesson on my blog: My Chris Uphues Lesson! This one is perfect for a sub plan as it comes with a free handout.
Looking for a school-wide project? I have a ton of collaborative ideas on my blog (check out this post). This one involved each grade level creating a heart with a different medium!

This Britto-inspired lesson was another collaborative we did and...it was a sub plan! Check out the lesson video and process here. 
Looking for an easy one day lesson!? Look no further, I got you right here!
Check out these scrappy hearts made by first grade! This was actually a lesson with a focus on positive and negative space. The kids were so excited by the negative space their cut out hearts created that we filled the space with tissue paper on plastic. More here. 
Aren't they so pretty up close?
And this is what we did with the hearts we cut out! Just black and white painted designs. Simple and so pretty!
Do you want to explore printmaking with kindergarten students but you don't know where to start?! Try this easy and fun lesson on for size!
Once your students are done printmaking, you can take the hearts and create THESE! Aren't they so pretty?!

Got scraps of painted paper laying about?! You're an art teacher, of course you do! Spend some time teaching the kids how to cute out hearts and create these cuties! Use them to hang as mobiles, put them in windows, send to faculty as love notes...the possibilities are endless. Details here. 
Last but not least...check out these James Rizzi birds! Full lesson with video here. 

Thanks for dropping by, y'all! Know that it's TOTALLY OKAY to ease on in to this new school year. The slow you go...the more they will GROW, I promise! Slow it down, focus on what matters and enjoy art teacherin!

Love ya!

photo signature_zpsd10b3273.png

Wednesday, August 9, 2023

14 of My Favorite Lessons for Dot Day!

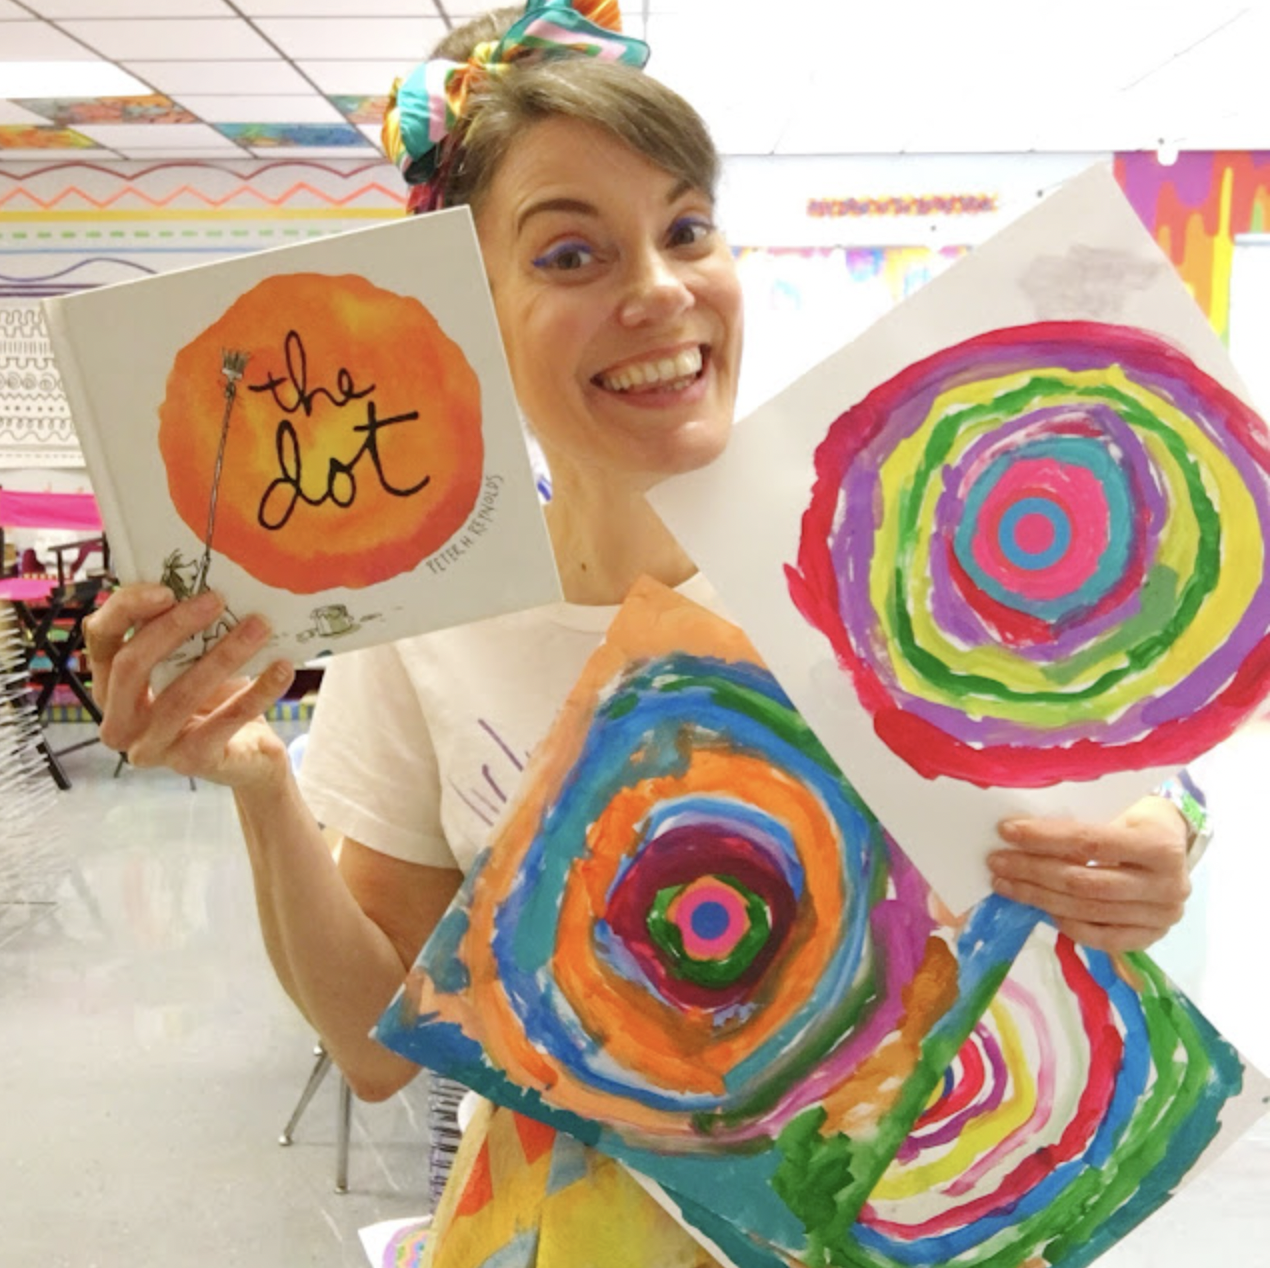
The start of the school year is my favorite time to read and celebrate the book The Dot by Peter H. Reynolds. Not only does it teach our students that everyone is an artist and how to embrace a growth mindset but...Dot Day is a celebration of JUST THAT and it takes place every year on September 15th. Perfect timing!

I have kicked the school year off with MANY different Dot Day art lessons and I thought I would pile them all into one big blog post just for you. From simple one-day lessons to longer format lessons, I've got you covered. Be sure to look for the links and give them a tap. Many links contain (free!) handouts and videos for you to use in your art room. 

Okay, let's get started!
#1 A lesson that I have done FOR YEARS with my kindergarten students is this Dot Day lesson. Right after our First Days of Art sculpture project, we dive into painting! If you follow the link, you'll see me teaching painting to my kindergarteners on their third day of art class. 
I've done this lesson a couple of different ways. Sometimes we paint on cardboard pizza rounds (ya know, cuz they are a circle and all) and other times, like here, we paint on squares of paper. Regardless, we always start with a dot sticker right in the middle.
#2 Last year, I had everyone create a painting the same way as those kindergarten pieces. Once complete, the students cut their paintings into fourths and rearranged them onto another square of paper. Details can be found here. 
Once complete, it was hung as this large collaborative piece!
#3 Last year we also went Dot Day WILD by doing centers. I LOVE doing centers with the kids because it makes it so, in a short amount of time, they bet to experience an assortment of materials and methods. I created short videos to talk them through the centers so they could just go for it! You can see the end result in this blog post. But be sure to check out my methods and videos for how these were created here
#4 Dot Day Printing was one of the kid's favorite dot day activities because they had instant masterpieces! All we used were pizza pans purchased at the Dollar Tree and paint! They signed and gave their paintings a name and we strung them throughout the halls. This was a one day activity with a huge impact. 
We also read Little Spot of Kindness which was a great one to read at the start of the school year!
#5 If you teach older students (5th and up) or you just want to dive into a longer-format project for Dot Day, you may want to give this string art lesson of mine a try. Video included in post!
I actually did these at the start of the school year with my fourth graders and they looked amazing for Open House!

#6 Circle loom weaving is one of my most popular blog posts! I think it's because...I found a way to make it easy for kids to learn and enjoy. Even though the blog post is a little bit older, it still has all the video details you and your students need. I've done this lesson successfully with second grade on up. I would recommend that if you do this at the start of the school year, third grade and up is the best age group. 
Even simply painted, these plates are beautiful! Let me walk you through how we make these without the mess of mixed colors and patterns. 
#7 Check out these simple metal relief pieces my third graders created one year! I'm a sucker for Sharpies and foil, y'all. Lesson here. 
So sparkly!
#8 Need a SIMPLE yet BEAUTIFUL Dot Day display? Try this one!
Now let me offer an update for that post: PLEASE when doing these coffee filters, PLEASE...do yourself a huge favor...don't dry them on plastic. Have kids create the dots on a STYROFOAM plate and let them dry on said plate. I would apologize for shouting but this is a BIG mistake I see folks make! When it dries on paper, the color leaves the filter and stains the paper. Then you have a sad looking filter! So...listen to your Mama Cass on this one. I beg of you!

#9 Dot Day Party! Why not throw some huge sheets of paepr on the tables, bust out those metallic art supplies like markers, oil pastels and paint, turn on Emily Arrow's the Dot song and let them create their own dots as they dance around the room?! That's how these were created and used as a backdrop for our giant hallway display. Check it out in the link!
#10 To know me is to know my love of CARDBOARD PIZZA ROUNDS! I buy them in bulk from GFS. Check out the brand called Circle King. I will always love and redo this lesson!
The best part? The fact that we paint on both sides which turns these circles into an instant mobile! Check out the blog post to see how we display them all!
#11 Aren't these DIVINE?! And they were so easy to make! All the details and supplies used can be found in this blog post!

#12 This first grade (yes, first grade!) mural was a big undertaking but we kept it up all year. Can you blame us? We started with these Dot Day inspired flowers. Lesson here!
#13 If Dot Day sneaks up on you OR you go back to school a little later and want to do something quick, this lesson is a fun one and done lesson! And you can find the free handout here!
#14 Why not take your favorite back to school lessons and just...do them round? That's what I did with my favorite kindergarten lesson! 
Then we hung them all together for our display!

So whether you keep it simple or go hog wild, I do hope I've given you some inspiration here!

Love ya! 


photo signature_zpsd10b3273.png