Showing posts sorted by date for query Chris Uphues. Sort by relevance Show all posts

Friday, March 13, 2020

My Favorite Lessons for Home-Based Art Education!

Hey, y'all! I'm about to share some of my fave home-based learning projects but...this is just the tip of the iceberg! I have a TON of art lesssons on my YouTube channel for you and your artists to explore. Be sure and subscribe as I'll be adding many more!

Currently, we as educators find ourselves in the most unusual of situations: away from our students for an unforeseeable amount of time and wanting to still connect, teach and create. If you are like me then your district has requested that you attempt to do just that with home-based learning. Because this is unchartered territory, the idea of teaching remotely is confusing, daunting and overwhelming. Where to even start? 
I've been putting some serious thought into this topic for the last couple of days as I create fun art activities for my students to do at home. I'll be sharing them all right here (for free, of course!) but in the meantime, I wanted to share with you the home-based art lessons I plan to use. Each of these lessons, videos and PDFs are FREE for you and your students can use right now. Feel free to include in your take-home packets or modify to fit your student's needs. Let's begin with this Monochromatic Self-Portrait lesson that is appropriate for kindergarten on up!
Just click for the video! Because many students may not have markers at home, you might suggest crayons for them to add color. 
This Colorful Village lesson was one that all of my students loved! I did it with my first through fourth graders and it was a huge hit. In case students don't have paint at home, markers and crayons can be used. Without those supplies, this could simply be a great drawing task for them to work on creating three-dimensional buildings. Here's the video:
These colorful houses were so fun to create!
My fourth graders always loved this Romero Britto-inspired self-portrait project. I do think that younger children would love it too. 
Again, consider suggesting students swap out supplies used for what they have on hand at home.
Chris Uphues is easily my student's favorite artist! And can you blame them for loving him so much, his work is just so full of joy! You can check out the entire lesson here. 
The link to this blog post also includes free downloadable PDFs!
Introduce your students to both James Rizzi and Vincent van Gogh with this fun lesson. Click the link for free handouts! Here's the video:
Of course, if you want to get kids creating, then you could always have them create their own sketchbook! I plan to create a video to show kids how to create one easily. In the meantime, they could use the Sketchbook Decoder Sheets found here to personalize their sketchbooks! 
If these look kinda familiar, we have done a similar project with my Getting to Know You sculptures. That project is also one that could be done at home with improvised materials!
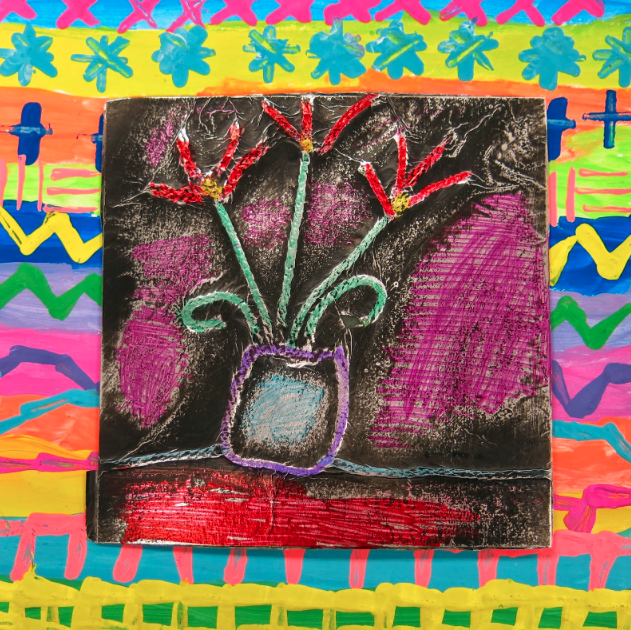
Times like these could get you down...but we can't let it! So why not have students create drawings of people, places and things that they are grateful for? Click here for two free PDFs!
If you are required to send home a packet as we were in my district, you might consider downloading and printing out this sheet and including a circle sticker. These can be found at the dollar store. Children could access a telling of The Dot on YouTube and create their own work of art in the frame!
If your students have access to paper, scissors and glue, this easy Greg Mike-inspired project would be a blast for them! 
Without access to construction paper, students could simply use the paper that they have on hand.
A lesson that is always a hit with my students is making this pop-out star. They love creating the patterns and then writing about themselves. Again, think of an alternative set of supplies for students to use so they can create at home.
Alright, y'all! Stay tuned as I have much more to come. I hope that gives you and all the young artists out there a fun place to start!

 photo signature_zpsd10b3273.png

Saturday, February 15, 2020

In the Art Room: Marker Hacks in the Art Room!

Hey, y'all! Today I'm sharing my very favorite marker hacks! In this post, I'll be sharing my favorite lessons involving these hacks but be sure and listen to the podcast episode where I share even more details. Be sure to click on the link and visit the posts I'm sharing...these are free lessons and many of them include a video as well as free handouts for you and your students! Here's the podcast episode:
James Rizzi meets Van Gogh Cities! This project was a huge hit with my third and fourth grade students. What I loved is that my students had a chance to explore painting but without the mess! I did this project near the end of the year when we were completely out of watercolor paint. Did you know that you can use markers as watercolor paint?! All you do is color and add water! I loved the technique so much I did it for the next lesson too.
 Chris Uphues Hearts! This lesson began as a sub plan and quickly became a kid and teacher favorite! I know many of you have done this one in your art rooms and it makes me so happy. Again, we outlined the hearts in marker and then used paint to "wake up" the marker and turn it into paint. 
 Marker Prints! In the podcast episode I mention printing with markers and it being a little tricky when you dampen the paper. I had totally forgotten about the photo I shared above...last year we used baby wipes instead of a sponge and water and it proved to be great at getting the paper just damp enough to pull a print. You can hear more about this in the episode and definitely check out more in the link!
 I mean, how fun is that?!
 Color Diffusing Coffee Filters! I think many of us know about this hack BUT...did you know...that after your students are done coloring their filter they should LEAVE THEM ON A STYROFOAM PLATE when you spray with water and allow to dry. Why? So that the marvelous marker color stays on the filter and doesn't drain out and get on the surface below. Hear more about that in the podcast episode. 
 We attached these using paperclips and hung them in the windows of our school for Dot Day!
 Self Portraits in Kimonos! Here is another use for those coffee filters! This lesson was a kid favorite and look how precious they are! More details in the link. 
 Children's Day! These color diffusing fish came from our sponsor, Roylco. I love using color diffusing papers with markers and these were a huge hit! 
 We used permanent markers for details we wished to remain and waterbased markers for ones we wanted to spread. We also used watercolor paint for more pops of color. Notice how the fish is on a plastic bag...this is how the fish dried as well so that the color would remain on the fish!
 Again, we hung these in our large bank of windows and they looked so beautiful. 
 To attach one to the other, I used paperclips. I also used paper clips to attach the fish to the ceiling tiles. 
 Making Marker Juice! What to do with all of those dried out markers?! Make Marker Juice! Now in the podcast, I share an easy way (as seen above) and the hard, better results, way. We used these paints to create a background for our "Ain't Gonna Paint No More" self portraits. 
My kindergarteners had a big time making these!
 Foil-Covered Printing Plates! What to do with printing plates once printmaking is complete? Cover them with foil and make a new work of art! I don't talk about permanent markers in the podcast but I did want to share the projects we've done with them here. Permanent markers are great for many reasons but one is when coloring over foil. They make the most beautiful shimmery effect. 
 Dot Day Sparkle! Check out this beauty! These were made with Styrofoam plates, foil and permanent marker. 
 Foil Relief! When weaving one year, my students were stressed about the amount of waste yarn we were throwing away. We decided to keep it and then create with it! Check out the blog post for details.  
Speaking of not wasting a thing, we also do something similar with our printing plates! Follow this link for more. 

I hope you learned a fun and new marker hack today! 
 photo signature_zpsd10b3273.png

Tuesday, January 7, 2020

My Favorite Lovey-Dovey Lessons (Just in Time for Valentine's!)

Welcome back! It's been a minute (okay, several) since I last blogged and while I missed you all dearly, you guys: I needed a break! In all truth and honesty...a couple things have been going around here on the homefront that have kept me away. First of all, I'm just not feeling it this year. There, I have said it. I've actually said it quite a bit here. And I know this is normal, a season in the art teacherin' life, it's still frustrating. I'm not hopping out of bed with excitement about the day ahead. Sure I can fake it but...I know that it's not my normal, you know? I do think a large project I'm working on has been a contributing factor. I've worked on big projects while teaching before ('member this book?) But this new thing it's, well, bigger and unlike anything I've tried. So other things are starting to slide. Blogging and being completely present and excited in the art room. 

BUT Y'ALL DIDN'T COME HERE FOR ALL THIS, did you? Sorry, not sorry. We all need to overshare sometimes and you just happened to be a good listener. Thank you

Now, let's talk about projects that are perfect for this time of year: Valentines Day-ish lessons! Be sure and click on all the following links as MANY of them have videos for you to share in your art room with your students. Here we go:
Romero Britto-Inspired First Grade Hearts this lesson was a huge hit with my students and involved line and pattern review as well as some fun color exploration with tissue paper and paint sticks!
 Heart Prints with Kindergarten was such a fun way to share printmaking with kindergarten in a way where each student was successful! 
Foil Relief Heart from Kindergarten Printing Plate this was a fun way to do a cool project with our leftover printing plates. Kindergarten then painted the background in a rainbow review.
Robert Indiana Love Prints by First and Second Grade my kids love printmaking. We explored making a ton of prints on styrofoam plates before adding the paper letters on top.
Chris Uphues-Inspired Project for All Grades You'll definitely want to check this lesson out, it's perfect for a sub, comes with a video and free handouts!
James Goldcrown Hearts for All Another easy lesson and a quick one too...and one that introduces a contemporary artist. Win-win-WIN!
First Grade Woven Hearts with Stitched Edge We just finished up weaving in my art room and we just might be doing this next. 
This Our School Has Heart mural is a blog post with so many ideas! One for each grade level, be sure and check it out!
Valentine Animals for All my kids loved this project and I'm sure yours will too. All the videos and details here!
A Contemporary Artist Review! This one was one I did with my older students and it was a blast. We learned about four contemporary artists who use hearts in their work. Video included!
But wait, there's more! So many more Valentine's lesson ideas here. Hope you enjoy!
 photo signature_zpsd10b3273.png

Monday, September 2, 2019

DIY: Spoonflower Student Artwork Dress!

I've had it on my mind to print my students artwork on fabric for a very long time. I've done just about every variation of kid-created fabric for dress-makin' such as having them color IKEA coloring sheet fabric which I then stitched into a dress (more details on that dress here): 
Or the time I found the fabric of picture frames! I had my students draw their self portraits on the fabric before creating that into a dress. Both of these dresses were created with Graffiti fabric markers. They've seen plenty of washing and, while the colors have faded a bit, they still look pretty vibrant. And the kids absolutely love them. More details on that dress here. 
But the idea of creating fabric from student work is one that I've been toying with every since hearing about Spoonflower. In the past, I've ordered fabric from Spoonflower and made a couple of dresses with designs created by artists. 
You can check out the details of this dress and fabric here
And details of this dress can be found here. Having ordered fabric from Spoonflower before, I knew I liked it. The fabric I ordered has a good thick quality which is great for the kind of full dresses that I like to create. So, this past spring, just before I hung some artwork up for our art show, I laid a bunch of it out on the floor and took a couple of snaps with my camera. After the art show, I uploaded the photos to the Spoonflower website and was shocked how stinkin' easy it was to rearrange the works of art to create the desired pattern. 
 In case the artwork on this dress looks a little familiar to you, it's from one of the more popular lessons on my blog: The Chris Uphues Lesson for All! Here's a peak of just a few of the works of art based on that lesson:
Take a look at the work of art above and then the print quality below. Pretty amazing, right?!
 This weekend I decided to cut into this Chris-Uphues inspired, kid-created fabric and create a dress using one of my favorite vintage patterns. Now, I did use a circle skirt pattern for the bottom...so only the bodice was used for this dress. 
Here's a little peak at some of the other fabrics I had made with Spoonflower. I cannot wait to make them into dresses too. 
 Usually I'm all about the big belt but when I tried my big belt on with this dress, it seemed to take away from the print. So I went with a hot pink ribbon for the belt instead. 
 Not wanting to waste even a scrap of this precious fabric, I decided to create a couple bow to be featured at the base of the shoulder straps. 
I'm so excited to wear this dress to school and share it with my students. Big thanks to Spoonflower for working with me on this fabric-making adventure and to Chris Uphues for his constant inspiration. 
 photo signature_zpsd10b3273.png