Showing posts sorted by relevance for query chalk prints. Sort by date Show all posts

Monday, February 13, 2017

In the Art Room: Chalk Prints and Shaving Cream Marbling

In second grade we are working like crazy with our short 30 minute art classes to try our hands at two different paper treatments: floating chalk prints and shaving cream marbling. My goal has been for all of my students to attempt both processes twice before the end of class. It's a go-go-go kind of class but it's a lot of fun. When I shared a couple short videos of my students working on these papers, I got a lot of questions about the process. So I created a video that will walk you through each. I'll also go through the supplies needed in this here post. Here's the how-to video:
Supplies for floating chalk prints:

* Paper. I used 6" X 9" papers. These will be used for the covers of their Rainbow Book. I only order between 80- 90 lbs paper for the art room. 
* Chalk. We used Freart Chalk by Prang. I like this chalk because it's high in pigment and thick like sidewalk chalk.
* Tongue depressors. We used the big ones which you can get cheap at the Dollar Tree.
* Tub of water. I made it so each my students had their own tub to save on time. I see my second graders at the end of the day so this meant I didn't have to hustle to move the tubs for my next class. 
If you watch the video, you'll see just how easy this process is...and how beautiful the results are. 
I have a feeling the kids are going to have a hard time deciding which beautiful papers to use for the covers of their Rainbow Book!
When doing these chalk prints, you can even use stencils to create a really cool look. Check out this blog post where we used star stencils
The best part is, you don't have to "set" these creations as you would normal chalk pieces!
 For shaving cream marbling, you'll need the following:

* Shaving cream. We used cheap dollar store stuff.
* Liquid watercolor.
* Paint brushes.
* Tongue depressors.
* Paper. 
This process required more steps so some of my students would get excited and forget those steps. I made sure to appoint my Art Teachers in Training who did a wonderful job reminding kids of the steps. Yay! 
I did not change out the bins of shaving cream or water. For the floating chalk prints, it was not necessary. For the shaving cream, it just meant that the following prints had more color. 
 Again, so pretty! I can't wait to see these on the covers of their books. Here are the books they are creating:
I have done shaving cream prints before...but never in a closed container. I am never going back, y'all! The mess is contained...like, literally.
Have y'all done these kind of prints before? I'd love to hear about it! I'm also curious to know what you did with your beautiful papers. 
I'll be sure and update you with our completed Rainbow Books!
 photo signature_zpsd10b3273.png

Thursday, January 23, 2014

In the Art Room: Floating Chalk Prints

Ya'll might recall the suminagashi or paper marbling technique I recently shared. In that post, I shared the pros and cons of the whole experience. They kinda went like this. 

Pros: 
  • The kids loved it. Just the idea of making paint float, creating a design and then capturing that floating paint on paper was thrilling for them. 
  • The results were usually pretty rad. 
  • Each paper piece was unique, just like the artist.
Cons: 
  • The carrageenan (powderized seaweed) and water mixture had to be blended the night before and left to "rest". Which meant I had to remember to do it before leaving for the day. And me remembering ANYTHING at the end of a school day, other than picking up dinner at the drive thru, is a miracle.
  • The stuff feels like snot. Like super snotty snot.
  • Near the end of a marbling run, the designs were often not as vibrant because of the muddied waters.
Having experienced all that, I shared my love-hate on the aforementioned post and asked your advice. And ya'll delivered! This here floating chalk project was one of the mentioned ideas that I thought I'd share with you. But before I get to that, here are some other great ideas that were suggested: 
  • Ingrid of NorridgeArt wrote: I've used Elmer's art paste, which turns out to be methyl cellulose, which works great and is really comparable in price as far as I can tell, to buying it in bulk. I would second using the tote-trays. After many uses, the remaining acrylic paint sinks to the bottom, and eventually, it does gray the water and dull the transferred colors a little. I haven't done this for years and I think I will crack into this soon! Fun! 
  • Phyl of There's a Dragon in my Art Room said:  Hey, Cassie, I don't know why I didn't think to tell you this before: liquid starch (the inexpensive blue stuff in the bottle) works GREAT for marbling, using watered down acrylic paint just like you did. And we used cheapo plastic forks for marbling. Only when we were done, we used tissues to blot them gently. THAT was the disgusting messy part, but the results looked a lot like yours, brighter than shaving cream marbling. Test it! (She also wrote on my facebook page): Have you done shaving cream marbling? It's easy, it makes your room smell good, and when you are done the shaving cream all over the place cleans the tables!
  • Laura wrote:  Do not be afraid to experiment with India inks. The best color you can get is to use thinned down oil paints but with students it's not the safest method. (I too teach kids in my private studio) I have gotten the best results with kids using air brush paint. The createx brand is the one I have used with good results. My friend told me the best description she could give to how much to thin down the paint it get it to the consistency of whole milk. I found that those plastic utility tubs are perfect for using to put the mixture in- keeps the paint contained better when they are putting it on the moss mixture. I use small paint brushes to put the paint down because they seem to have better control than with the eye droppers.
  • Amazingly awesome author Pam Stephens (of the Dropping In book series) wrote:  I have a never-fail method that Nancy Walkup {editor of SchoolArts} taught me. It's nothing more than a tub of shallow water, Prang Freeart chalk, something to scrape the chalk with (plastic knife works), an old comb or fork (to stir the chalk), and heavy white construction paper. I wear plastic gloves because the chalk stains like the dickens. Just hold the chalk over the water and scrap whatever colors you want. Stir with an old comb or whatever you have to get a nice design. Drop the paper on the chalk. Let it sit for about 30 seconds. Pull the paper off the water and TaDah! Marbled paper. Dries in a jiffy (about half an hours). You can also use colored construction paper depending on the colors of chalk you use. WARNING: This is addicting.
  • Mrs. Walton commented:  Use tote trays instead of cookie sheets. Fill half way with water. Have one sheet of posterboard directly next to the tote tray so you can immediately have a place to put the soaking paper. Use pastels and a cheap pair of scissors to scrape color onto the water and let it float. If they accidentally break the chalk into the water, tell them not to fish it out. The minute you stick your finger in teh water, it breaks the tension on the water and the chalk sprinkles start to sink. Folding (not creasing) so that the ends of the paper are up (think U shape), set the paper in the water center first. Slowly let the edges go onto the water mixture. This keeps water bubbles from forming (as badly) on the paper. Then, I tell the kids to grab the corners closest to them and drag the paper up towards them #1 so that they are dragging more chalk onto the paper as it's lifting, #2 so they can see what they are getting when they lift it, #3 so that the water is still dripping downwards when it's lifting into the tote tray. Then, simply place it onto the posterboard next to it.
Aren't those just the best suggestions?! Thank you, art friends, you're the best. When I ran out of carrageenan the day before my last group of students were to marble, I decided to give Mrs. Walton's idea a go as I had all mentioned supplies on hand. And it was a total success! Here's how we did it.

Just like she mentioned, I filled some tote trays with water. I decided to cut some old plastic lids in half as scrapers and laid out some chunky chalk.
Now, I have to recommend that you not use any ole chalk for this project. I mean you could...but the small stuff will probably just break and side walk chalk is just too lacking in color. I strongly recommend ordering a couple sets of Prang's Freart chalk (I think I ordered mine from Nasco). It's vibrant and big enough for little hands.
Ya'll, the process was so super simple it was kinda ridiculous. The scrapped their chosen colors with the cut lid until their tray looked like this...
(ooooh, pretty.)
Then, holding their star parallel with the surface of the water, they dropped it onto the water while I lowered their paper on top of the star. Together, we "massaged" their paper to capture the chalk. We knew it was working when we saw a faint outline of the star and the colors of the chalk through the back of the paper. Slowly, I lifted the paper out. Sometimes, I would see a white spot where it didn't take at which point I would lower the paper again and attempt to pick up the chalk. Once I lifted the paper out, the student plucked the star from the water. They looked a little like this.
Amazing, right?
I love the layers of vibrant color.
And their stenciled papers looked like this. The kids thought it was Christmas.

Once dry, these were sprayed with fixative (or AquaNet if you live in the 80's) so the chalk wouldn't smear.
So. Would I do this method again? Definitely. It was so much easier and the results were ALWAYS amazing. It was a fun and new printing technique that fascinated the children. 

However, it just wasn't the same as suminagashi. This isn't true paper marbling because you cannot really manipulate the chalk once it's on the surface of the water. For that reason, I will continue to also use the suminagashi technique...even if the stuff feels like super snotty snot.
By the way... I'm so super stoked about this Saturday's conference, you don't even know! I cannot wait to see what other art teachers have to share. Are any of you lovelies attending The Art of Education's online conference this Saturday? If so, just an FYI, my presentation is off the chain goof-ball. Just so's ya know. Looking forward to chatting with you!

Sunday, January 26, 2020

In the Art Room: My Favorite Chalk Pastels Projects and Techniques!

Hey, friends! We are currently up to our elbows in chalk projects in my art room and it got me thinking...I should share my Top 12 Chalk Pastel Projects with y'all AND my tips and tricks. I steered clear of chalk for the longest time because of the mess; the lack of understanding how to set the stuff and because the chalk I had on hand for my kids was, well, crap. So I'm gonna debunk all of this chalk nonsense and hopefully help you get excited to bring this beautiful and vibrant medium into your art room. In this post, I'll share my fave projects but if you want even more details, check out this podcast episode:
Sandra Silberzweig Inspired Abstract Portraits I don't often repeat lessons, but this one is a hit year after year. Follow the link to a video that you can share in your art room. 
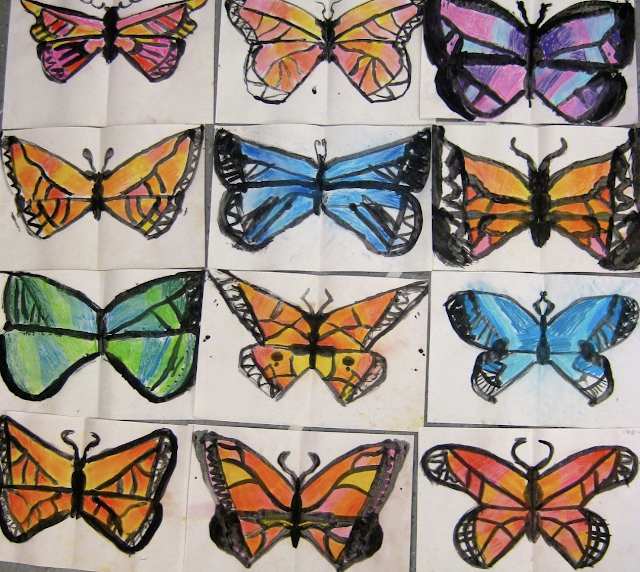
 Symmetrical Butterfly Project with Second Grade This lesson includes a video! It was a fun project that I did with my second graders and each one was a beauty. 
Claire West Inspired Landscapes with Chalk and Liquid Starch If you've never used liquid starch with chalk before, oh boy, y'all are in for a treat! This hack is magical and I cannot wait for you to give it a go. More details in this blog post. 
Faux Stained Glass Project We did this a few years back and the results were so striking! You can find more details here. 
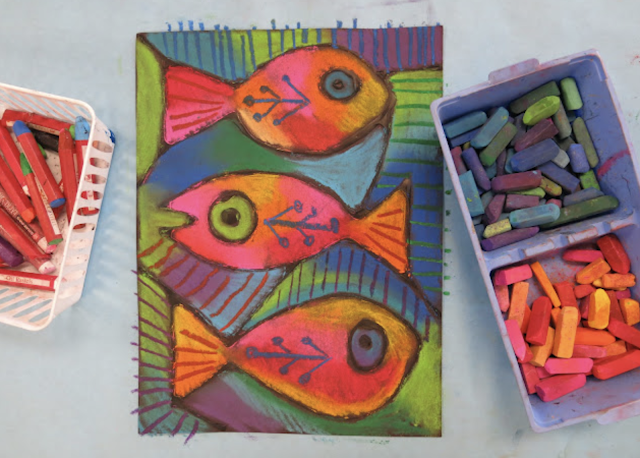
 Sandra Silberzweig Inspired Fish! I love Sandra Silberzweig and her work as do my students. Anytime I can share her with the kids, you better believe I'm gonna. This project did just that. Video included!
 Crayon Chalk Collaborative Working together, my students created these large pieces that were so fab. You can see all the details here. 
 Fourth Grade Fauve Portraits This project uses the chalk and liquid starch trick and the results are so vibrant. More details here. 
 Desert Landscapes with Third Grade Stencils and chalk go so well together. More details on this fun lesson here. 
 Floating Chalk Prints! Behold! This is the coolest thing you can do with chalk. Don't believe me? Check this link! 
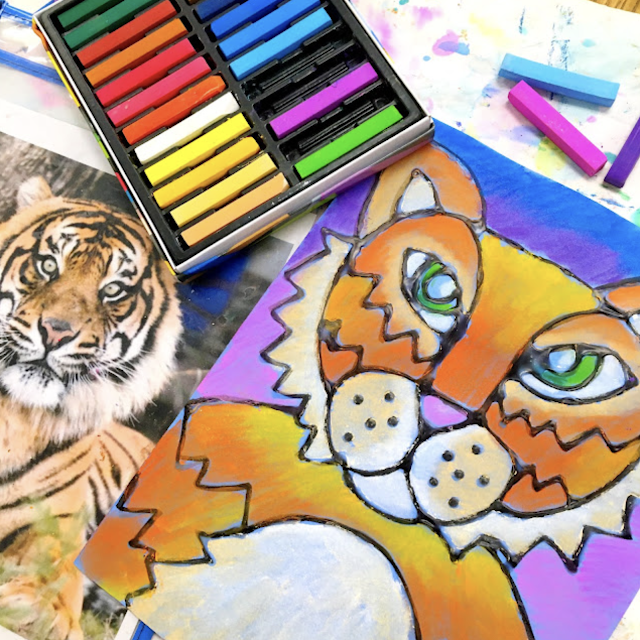
 James Russo Inspired Animals with Chalk and Oil Pastel We're the tigers at my school so this project was just perfect. More here. 
 Glennray Tutor Inspired Marble Project This one was fun and had the kids so excited to work in the third dimension! 
Annual Ceiling Tile Legacy Project! This is a massive undertaking I do every year with second-grade students. They create chalked ceiling tiles that are then placed in the ceiling permanently. How fun is that? More here. 

 photo signature_zpsd10b3273.png

Tuesday, May 2, 2023

Top Tips and Lessons for Using Chalk in your Art Room!

Hello!

Last week I dumped everything I could think of into one video all about watercolor painting with kids. I hope you got something out of that video and enjoyed it! I made it just for you (and your sanity.

This week, I thought I'd share all things chalk! I know a lot of art teachers avoid chalk because of the mess. I'm going to encourage you to give this video a watch and try some of these tips on for size. I think you'll find it helpful...and maybe even fall in love with using chalk with your students! 

Also in this post, I'm throwing in all of my very favorite chalk lessons and projects. All are free for you and your students to enjoy. 


I shared several projects in that video so I thought I'd place them and the links below for you to use!
Always a hit! This one is done with the liquid starch and chalk hack I shared. Here's the video. And here is a blog post of the finished results!
This project was done with the same method of starch and chalk. It's a huge hit with the kids. Video lesson is included here!
Another method for liquid starch and chalk is this one I did with my fourth grade! Video lesson included here. 

One of my most popular lessons of all time is this one! BUT don't do what I did: don't make black glue! Instead, follow my demo in the video and go the much easier route of using Elmer's Glue All and black marker. 
Here's a blog post with the finished results. This one is always a crowd pleaser!
Here's another one inspired by the artist Sandra Silberzweig! Video lesson included here. 

Yet another glue and chalk combo! Lesson video here. 

Before tackling their butterfly ceiling tile project, one second grade class created these beauties! A fun project for the end of the school year. 
Looking for a quick chalk project that introduces a contemporary artist? Try this one! 

I have a LOT of videos and blog posts on our annual chalked event but this blog post breaks it all down for you, if interested!

This lesson is fun to show kids how to use stencils with chalk! Full lesson and artist reference included in this blog post (with video!).
Floating chalk prints is ALWAYS a huge hit! And this year, I did it with kindergarten. Independently! You can read the details here.