Showing posts with label fourth grade. Show all posts

Monday, January 8, 2018

In the Art Room: Top 15 Fave Valentine's Day Lessons!

After winter break, I always find myself in the mood to start Valentines-y/Warm-Fuzzy/Lovey-Dovey projects with the kids. When doing a little searching on my blog last night, I discovered that I've done 15 Valentine's-themed lessons over the years. I had no idea I'd done so many! I thought I'd share them with you today. May of the links back to the original post will include an instructional video. Please let me know if you do any of these lessons, I'd love to see what you and your kiddos create!

Robert Indiana Love Prints! Believe it or not, my sweet FIRST GRADERS created these a couple years ago! It was a great lesson for printmaking and definitely one I will be doing again. If you don't have printing ink, you might want to check out this blog post where I'll show you how to print with paper and markers!
James Rizzi Love Birds!  Who doesn't love James Rizzi?! These birds are based on some of his work and is a great tie-in if you've already taught Rizzi and his fun cityscape works.
 Recycled Hearts!  Last year, I had a stock pile of messy-mats from our months of painting. We used them to make these two fun works of art (see below also) and they were such a hit! What a great way to review the warm colors, pattern and line.
So much sweetness!
Chris Uphues Hearts! If y'all don't know who Chris Uphues is, then you need to! He's one of my fave dudes to follow on Instagram. His artwork is so fun, so happy and so kid-friendly. They had a blast creating these happy hearts inspired by him.
J Goldcrown Hearts! If you need a quick one day project, I would recommend this one for sure! You can introduce your students to another street artist, J Goldcrown, and have them work in chalk! This is a great project for just about all levels. 
Sculpture Hearts! Last year, I introduced my second graders to Celluclay with this project. I have 30 minute art classes with these kiddos so we had to hustle! We spent one day covering our foil hear in clay, two days painting and the last day stringing beads. These were one of my favorite projects for Valentine's day!
 My Heart Has Wings! If you want to do a feel-good project with your faculty and staff, might I recommend this one? We did it on a PD day and it was so much fun. Of course, this would be a great project for kids as well.
Candy Heart Sculptures! My fourth graders created these candy hearts last year and they had a blast. We used plaster strips which created a super hard surface for the candy. We even made giant candy boxes to display them in!
 Woven Hearts! Every year, first grade does a paper weaving and every year we do something a little new. Last year, they nailed the weaving part so well, I thought I'd introduce them to simple sewing. They did great and I loved hanging them up like a quilt.
Candy Heart Drawings! When my fourth grade early finishers were done with their candy heart sculptures, I had them move on to a drawing of their candy hearts with oil pastel.
Britto Mural! A few years ago, I had to be out for a couple of weeks for jury duty. While I was gone, I had my students work on the parts of this Britto-inspired mural. It was great because then there was a fun masterpiece to hang in the hall when I returned. You can check out the instructional videos in the link.
Valentine Animals! My kindergarten kiddos created these fun animals last year. I created an instructional video for each one which you can find by clicking on the link. 
Collaborative Heart Mural! Collaborative pieces are a lot of fun this time of year. If you follow the link, you'll see which grades created what for this huge collaborative pieces that still hangs in our front office.
Peter Anton Box of Chocolates! This might have been a kid-favorite as it involved using EVERYONE'S favorite art supply: puffy paint! Check out how we made the faux candies and boxes by following the link.

What are your favorite projects this time of year? Love to hear! 
 photo signature_zpsd10b3273.png
Read more »

Monday, November 20, 2017

In the Art Room: Britto-Style Selfies!

I have fur realz been slackin' on this bloggin' thing, y'all! My apologies...I've just become COMPLETELY OBSESSED with flipping my art room around. I know you've seen pics if you follow me here where I have been shamelessly oversharing. However, I'll be posing a pretty big reveal right here on Friday so be sure and wake yourself outta your turkey-day coma and pop back by.
I've also not shared new lessons here lately because I've actually been doing some "reruns" of projects from last year! I don't often do projects more than once (and usually not consecutively) but these selfies are for our Artome art show. They were such a hit last year when my fourth graders did them that I decided to bring it back. And I'm so glad I did, they turned out amazing...even if there were some whining about color-pencil-hand-fatigue! 
Here's the lesson video I created and we used:
The reason I decided to have every kiddo in the school create a self portrait is because I know that's what I would want if I were a parent: a kid created selfie! They are so sweet and fun. You can see what my first graders created here and my third graders made here. I'll be sure to post what kinder and second are working on as they finish them. 

 The kids were super proud of these...I love that with this lesson, the background serves as a way for them to show their interests. I'd also like to add just how much I'm noticing rainbows popping up in my students art work...I take full responsibility
Swoon!
 Now, I will say this: colored pencils...NOT.MY.FAVE. Ugh, y'all. The constant pencil sharpening buzz is enough to make me wanna stab my ears. Please tell me I'm not alone in this. 
 For that reason, I also give my students art sticks to add color. If you are not familiar, art sticks are colored pencils without the wood (heehee). Crayola makes them...but my FAVORITE are by Prisma Color. Of course, they cost one million trillion dollars but they are worth it and they last. We are down to the nubs in my room...hence the Artome fundraiser!
 Eyebrows on fleek, y'all. AND, yes, the S...she managed to get that Sharpied before I could convince her otherwise. Such a beautiful drawing of a beautiful girl. I love seeing the kids write JES...we have such a strong school pride!
 AND can I just point out that this sweet girl made the end of her hair into a paint brush that is painting her shirt?! LOVE! 
 But, back to colored pencils...for the longest time, when I would sharpen colored pencils (btw, do you say "color pencils" or "colored pencils"?) they'd break. Over and over until I was down to a tiny pencil. I used to think it was because the colored pencils were cheap (and that might very well be the case) but now I have a different theory. I blame...THE PENCIL SHARPENER. 
 If you join my FB LIVE chats (you can find them archived here...I go live every Wednesday at 8pm CST), then you've heard my theory on this. A couple of years ago, I splurged and purchased a $50 Exacto electric sharpener. And it's a loud pencil eater. When my mom came to visit recently, she brought me my old Panasonic faux wood, 5 lbs workhorse of a sharpener. Y'all, this thing is BANANAS. It will sharpen anything without breaking it and leaves the pencils FRIGHTENINGLY sharp. Like, I had to establish a rule: Y'all don't have to come up to me and show me how sharp your pencil is every time you sharpen it. I know. It's sharp.
 When I found another Panasonic faux wood sharpener at the thrift store the other day, y'all better believe I scooped it up. So, long story short: if you are tired of your colored pencils breaking in your sharpener, don't blame the pencil...get you a vintage Panasonic sharpener. I just did a quick search on ebay and here she is: 
That being said, do you have a fave colored pencil brand? A long time ago, Ticonderoga made a colored pencil and they were AMAZING. They never broke, the colors were bonkers and creamy. I found them on a clearance aisle at on office store years ago and they were my everything. Sadly, they no longer make them...and I've just been using what I've got since.
 And I kinda made a promise to myself to never EVER order any more. I have 8 tables in my art room with two large trays of colored pencils at each table. I recently had a former student volunteer and she organized all of my EXTRA colored pencils by color...the idea being that my students can go there and get whatever colors that their table tray might not have. Here's what my EXTRA colored pencils look like: 
 Yeah, I'm pretty much set for life. Unless I have either a beaver or a termite infestation, I'll be sittin' pretty with these bad boys for quite some time before I need to reorder.
However, if there is one brand that you think would be worth ordering...despite my clear over abundance, I'd love to hear!
 But, back to the lesson. My kiddos worked on these for about 2-3 one hour sessions. We drew with the video one day, added patterns and designs and traced with Sharpie the next and then spent the rest of time coloring. And coloring. And coloring.
 Oh look, rainbows!
 And more rainbows....ahem. 
 I cannot wait to see these framed at the Artome art show...I'll share with you when the show rolls around!

 photo signature_zpsd10b3273.png
Read more »

Wednesday, September 6, 2017

In the Art Room: Claire West-Inspired Landscape Lesson

Now that my fourth graders have made their contribution to our school-wide collaborative (details to come, stay tuned! I'm STILL trying to figure out my life, y'all) and completed their sketchbooks and their first couple of sketching tasks, it's now time for them to move on to the art makin'! I have decided to kick off the school year with landscape for all of my students. I also decided that I wanted my kiddos to learn about contemporary artists (and it so happens, all female artists!). It's with that in mind that I introduce you to the lesson I'll be sharing with my fourth grade artists: Chalk Landscapes inspired by the artist Claire West!
These drawings are my teacher examples...I had so much fun creating them, I couldn't stop! You can see the process in this video I created to be shared with my students:
Now let's take a closer look at some of Claire's work...
 Isn't her work beautiful? I love the colors! They are so rich and stunning. I knew chalk would be a good way for my students to capture that incredibly rich hue. 
I also love how her work really shows depth. What a great way for my students to learn about the horizon line, back-, middle- and foreground.
 Here are the supplies we will be using for this lesson:

* Chalk I really like Faber-Castell's chalk. It's vibrant and rich with no fillers or junk. They are my fave!

* Liquid Starch! The magical ingredient behind this amazing process.

* 11" X 17" Paper I went ahead and cut an inch off the normal 12" X 18" paper so that matting and framing will be easier in the future.

* Paint! This will come later...but we'll use a variety of colors of tempera paint. 
 This project will probably take us some time. A couple of classes for the chalk and starch...and maybe one class for painting. I'll keep you posted on our progress.
Why I am so smitten with the starch trick: no messy chalk pastel dust! No need to spray with hairspray or a fixative! No smearing! I'm so in love. Big shout out to my good friend Jennifer Avarado for sharing this trick with me.
 More landscape lessons for my other grade levels are in the works so stay tuned. I'll keep you posted here and on my YouTube channel
 Until then, happy landscaping!
 photo signature_zpsd10b3273.png
Read more »

Saturday, July 22, 2017

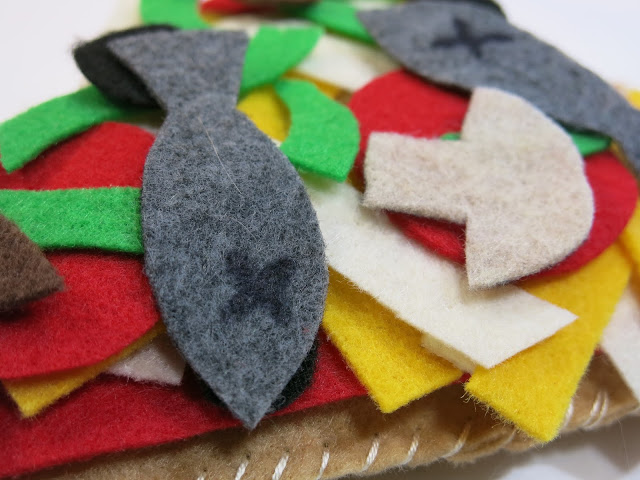
In the Art Room: Stitching Pizza Plushies!

A little over a month ago, I got an email from Trixi Symonds over at Coloured Buttons. She asked me if I'd like to join her super fun #sewasoftie project for the month of July. Her concept was simple: introduce kiddos to stitching with a month long sharing of sewing projects via her Facebook page (which, by the way, is LOADED with fabulous sewing inspiration for kids of all ages). I happily agreed and used my recent trip to Italy (and love for all things pizza) as my inspiration. 
Another reason I chose pizza is because my kiddos always find inspiration in food. Are your students/kids like that? It's so funny to me: give a kid a piece of clay and it's guaranteed that they will come back with a clay cookie, pizza or a taco. I know when I share this project with my third and fourth graders in the spring, they'll be all in. 

Let's talk supplies:

* Craft Felt in bunches of colors. I find that I have a TON of craft felt. Does it multiply? Are teachers secretly dumping the stuff in my storage closet? The latter is more than likely the case. It would also explain the ziplock baggies of broken crayons I always receive (y'all, I don't even use crayons!). 

* Chenille Needles are my jam. They have a big eye that is great for threading and a nice sharp point which is perfect for puncturing that felt. 

* Thread can be tricky. Get the cheap stuff and it can break with a slight tug. We use embroidery floss with the single thread...not the one with 6 threads. Cuz we ain't got time to be splittin' hairs. 

* Paper for creating a pattern and for making a needle threader.

* Scissors are great...and if you have one for fabric and another for paper then you are just the bee's knees. 

* Pins and a Magnet to park those pins. They make these great pin wands that my students love. You just wave them and the pins snap right to the wand. 
When I first got the idea to create this lesson, I kept getting more ideas. First it was allowing the kids to create toppings that can be changed at any time. Kind of like the felt boards I played with as a kid. That's why I created the segment in the video where the toppings are changed. Then I thought it would be great to introduce button sewing...for that the toppings would have to be tacked down. And, of course, I had to throw on some puffy paint because PUFFY PAINT MAKES MY WORLD GO ROUND. Thank you, Puff Daddy for the Puffy Paint. He's the one who invented it, right?
Then I got the idea for a silly-faced pizza. I spotted these giant googly eyes at the craft store and thought it would be fun. Because I wanted to add arms like we did with the Stitched Monster project, I knew I'd have to go about sewing a little differently. Originally I was going to make one video...but I decided that two was best: one for the Stuffed Pizza and Button Sewing and another for the Funny Faced Pizza
So, just some thoughts on sewing with kids: I usually do a fibers unit in the spring, after clay. Kids love sewing, weaving, felting, you name it...and it's a great follow-up to clay as they pink-puffy-heart-with-sparkles LOVE clay. However, sewing is a challenge that you and your students need to be prepared for. Whenever we tackle something new, I remind the kids that we are learning and that takes practice and patience. I tell them that some of them will get it right away...and others will take a little longer...but we will ALL get there. With practice and patience. It's important to emphasis this so that frustration does not lead to a defeatist mentality.
Now, I'll have my students glue their items down with tacky glue. But, for those kids creating at home who wish to change the toppings of their pizza frequently, they could simply keep their cut pieces in a sealed bag. 
This pizza was created the same way as the first but I really wanted to introduce button sewing. What better way to do that than with pepperoni buttons?! And, of course, puffy paint. 
No doubting that I grew up in the 80's...I got puffy paint in my veins. 
Shortly after posting my Stuffed Pizza video on my YouTube channel, Jeanne Kemp, an art teacher out of Baltimore shared this with me. She'd done the project with her students! How fun and they did a fabulous job. I had pizza for dinner in their honor. 
This project is a little more involved simply because of the addition of sewing the arms and sewing three sides verses two. For that reason, I'll reserve this project for my older students. 

I def don't plan on purchasing them all googly eyes as I don't have that kind of budget. So, more than likely, if my students decide to make a face, they'll have to create the eyes from felt. No biggie. 
 I really had fun creating these pizzas. They got me excited about hand sewing again...and the upcoming class I'm taking at Alabama Chanin. More on that to come. LOVE to know if any of you all have taken a class there before! 

Until then, have a super fun time stitching your pizza! 

Arrivederci!

 photo signature_zpsd10b3273.png
Read more »