Showing posts sorted by relevance for query candy heart. Sort by date Show all posts

Thursday, February 9, 2017

In the Art Room: Street Art Hearts

Ah...gotta love those early finishers and those pokey little puppies all mixed up in one big ole art class. I have just that currently with my fourth graders finishing their Candy Heart Sculptures (they are SO AMAZING, y'all! I'll share soon) and third graders wrapping up their Heart Shaped Box of Chocolates. What to do? I needed a lesson that would be a one-day event, engaging, reteach the principles of art and introduce the kids to a contemporary artist. So I created this fast and fun lesson on street artist, photographer and fashion designer J Goldcrown
When the kids walked in the room, I began the video. While it was playing, I pulled those kids who still needed to work aside, reviewed directions, passed out their supplies and got them settled in and working. By the time I was done, the video was in a great place for me to stop it and review the directions with the kids. Here's the video:
This lesson is so simple and effective that it can be used with students as young as kindergarten on up to middle. I gave my students the chance to use either white or black paper. Some kids enjoyed it so much, they made a masterpiece on both white and black paper. 
I love the work of J Goldcrown. It's been fun to introduce the kids to him and Chris Uphues. I love their heart-filled works! And these look so great hanging in the halls. 
I often get asked what brand of chalk my students use...we love KOSS brand chalk
 I don't use expensive fixatives to set the kid's artwork. Instead I use cheapo cans of Aqua Net from the dollar store. Work just as well. 
Each kiddo was super engaged in this lesson which was fab as it allowed me to help those kids painting their hearts.
You'll have to let me know if you give this lesson a go in your art teacherin' world! 
 photo signature_zpsd10b3273.png

Tuesday, February 7, 2017

In the Art Room: Third Grade Faux Box of Chocolates!


I have to share with y'all this faux box of chocolates project my third graders are working on...they are so excited! So far, we've chatted about our artist inspiration, Peter Anton, created an armature for our box of chocolates and used newspaper and wheat paste to papier mache our box. Next up, we are using our plaster cast forms to create candy! The above is my example...
 And this would be Peter Anton's! Don't you love it? He's an American sculptor who is often referred to as Candy Warhol. He's created many sweet and savory sculptures but at this time of year, I'm partial to the heart shaped box of chocolates. Here's the lesson video:
Here are the supplies we used:

* Tag board cut into 1" X 24" 
* Tag board cut into an 8" square
* Tape
* Newspaper
* Papier mache paste
* Plaster
* Paint
* PUFFY PAINT!

If you've never used papier mache with kiddos before, just a few things: 

* Check for allergies. I used wheat paste but made sure that we didn't have any gluten allergies before doing so.

* Sensitivity issues. Several of my students have sensitivity issues. Meaning, they don't like the texture of papier mache. For those kids, I had buddies who finished early offer them a hand. 

* This stuff is MESSY. In the best possible way, says me. However, we did a very successful clean-up party after the fact that the kids loved. When most kids were finished with papier mache, I explained to them that if they were standing quietly behind their pushed in chair, I would squirt shaving cream on their table. I gave them five minutes to go bananas, be loud, have fun and draw in the cream. When the five was up, I announced that we would be having a CLEAN UP CONTEST. I placed tubs of water and sponges on each table. My rules were there was to be NO TALKING...only cleaning. The kids were to squeeze their sponges over the tub of water and use it to wipe down the table. I also provided old hotel key cards for the kids to scrape glue off the tables. You can see my kids in action over on Instagram (I'm @cassie_stephenz). Not even gonna lie, they totally rocked clean up! The best tables got the grand prize of lining up first. 
I'll be sure to share an updated blog post when the kids have completed their boxes and candy. My early finishers will not only write about what they've learned but give their candy company a name, make a list of ingredients and design the lid of their box. I can't wait to see what they come up with!
Until then, Ima go eat me some chocolates, y'all! 
 photo signature_zpsd10b3273.png

Saturday, January 14, 2017

What the Art Teacher Wore #172

Allow me to just kick off this here What the Art Teacher Wore by saying No, I did not create that AMAZING felt flower Frida-esque crown I am wearing. It was created by art teacher Linda McConaughy who was so sweet and kind to send it to me. You can check out and purchase Linda's designs here. If there is something you have in mind, message her! And, if you've ever been to NAEA, you might also know Linda by her paint brush crown pieces (you can see me wearing mine here!). In fact, she'll be at NAEA in NYC this March (as will I, so excited) so you can check out more of her wares there. Thank you so much, Linda, I LOVE my flower crown and my students did as well. Matched my color wheel shirt completely!
 Target, You have the Best Kid's Clothes: I ain't ashamed to admit I just about purchased the entire Cat and Jack line at Target...for myself. Yes, it's kids' clothes. No, I don't care. That color wheel shirt is currently on clearance for something crazy like $2, y'all! top and skirt: Cat and Jack for Target

So. Did y'all survive Friday the 13th, the full moon and Mercury Retrograde (I'm not exactly sure what that is but if it had anything to do with the painting of one's hands and then licking it off episode I witnessed this week, I ain't down with it)? Thankfully, I have a long weekend to recover. It was my first week back after the break and we hit the ground running: weaving, sculpting, painting, printing. You name it, we were doing it. And all of it was in the name of LURVE...
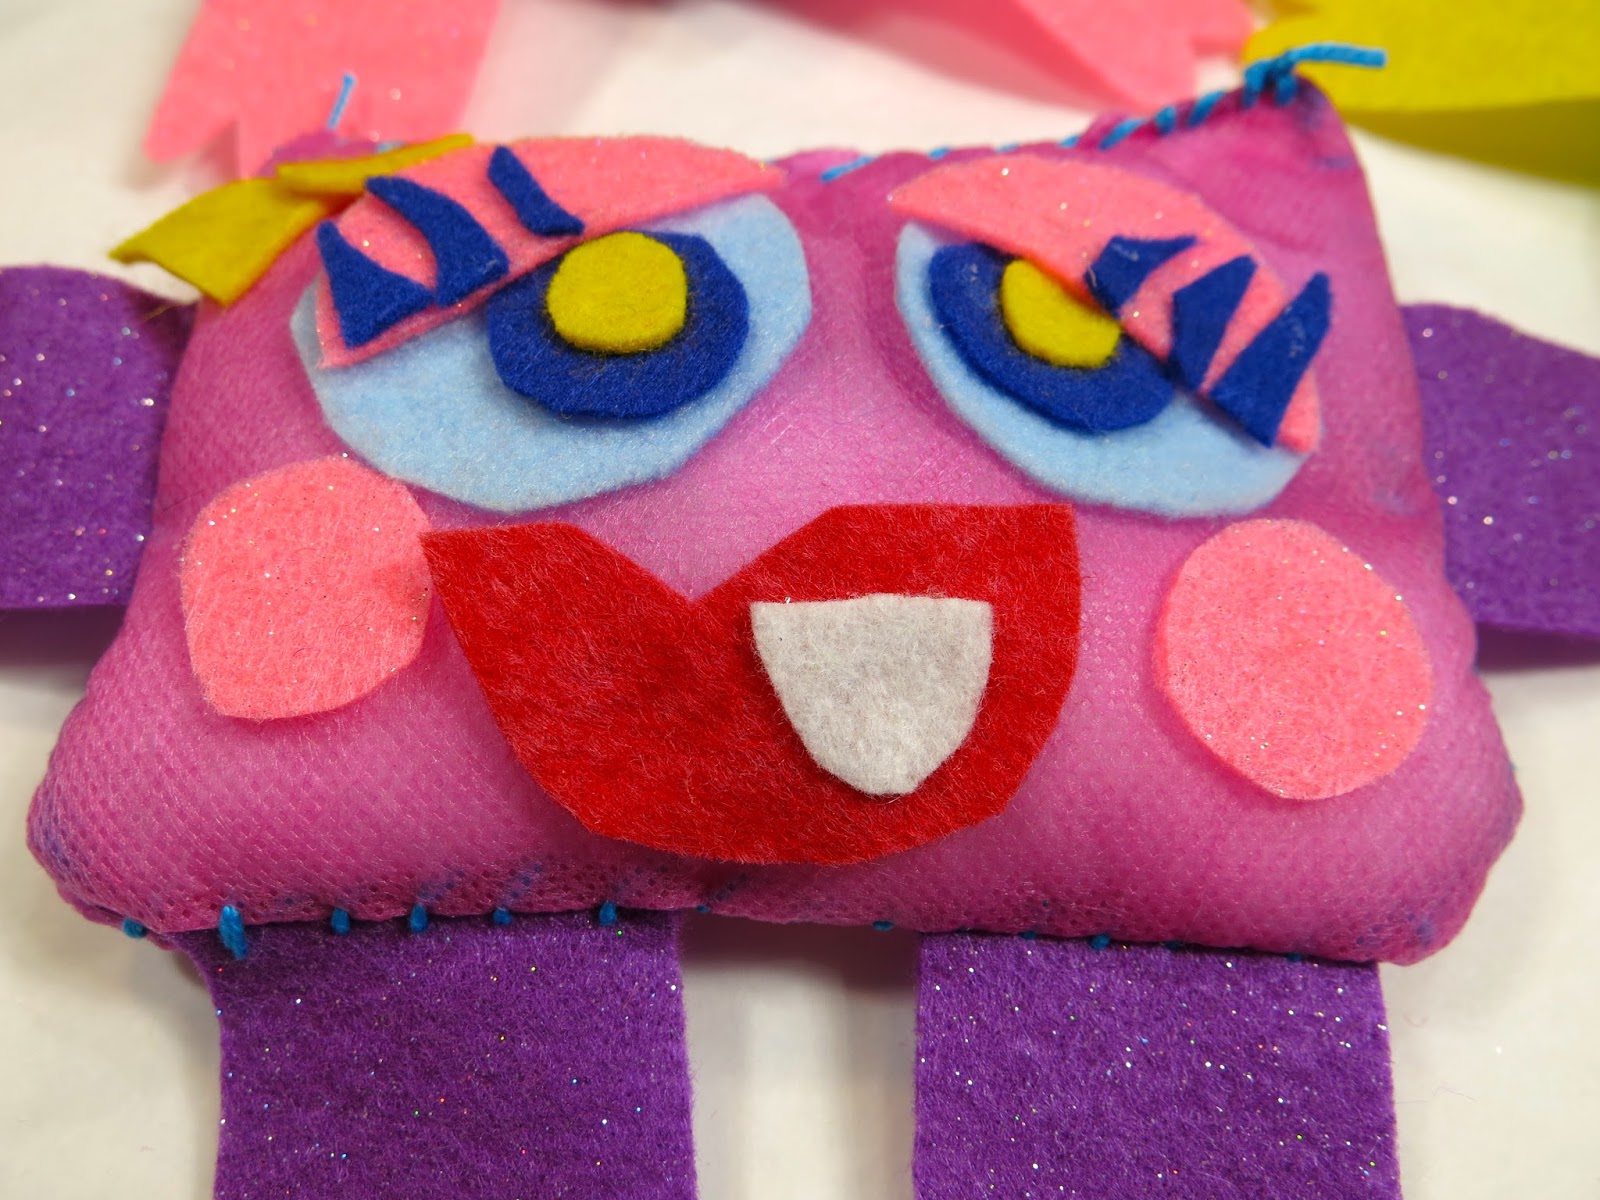
 Before break, my firsties had finished these weavings. Honestly, I had NO idea what we were going to do with them until Monday morning. I remembered that before break, these kids had whizzed through weaving. So I decided to see if they could handle a little bit of hand stitching. Y'all, they rocked it! You can check out the complete lesson here
With all the possible bad luck floating around, I decided to ward it off with some freaky evil eyeball jewelry. You can see more of this craziness here. I'm so on a 80's kick right now, y'all. I've had a hair crimper in my Amazon shopping cart for a week now. 
 The Problem with Wearing Kid's Clothes: Is that half of your students wear them too. I was told that I match several kiddos in our school, a couple in kindergarten and a few in first grade. Yep. I've got the fashion sense of a 6 year old. Sounds about right. top: Cat and Jack; skirt and tights: Target; boots: Frye
Second grade printed this week and learned about the artist Chris Uphues. I love his artwork but his street art hearts are my faves. The kids really got into his work. Lesson to come!
 Wonderful Wednesday: I was so excited about Wednesday because my fourth graders started on their Candy Heart Sculptures! sweater: thrifted; pins: vintage; top: JCrew; skirt: resale find at Buffalo Exchange (I knooooooow!); yellow tights and hot pink fishnets: who knows
We got out armatures complete and started on the process of cutting the plaster into strips. I wasn't about to do that myself so I put the kids on that one. Next week, we cover in plaster!
 When You Look as Ridiculous as You Feel: All day long. That's what happens when you dress like a kid, y'all! top and skirt: more Cat and Jack. I done told you I bought everything they had. Gift cards from Christmas came in mighty handy; shoes: Aldo
Second grade had so much fun printing hearts that I decided to create more stampers and have kindergarten do it as well. You can see how I made the stampers here. More to come on this lesson! 
All Eyeballs on Me: Yep, I had to. Details on this dress here. Shoes from Modcloth
 photo signature_zpsd10b3273.png

Wednesday, January 25, 2017

In the Art Room: Stitched Monsters!

Going LIVE tonight, Wednesday at 8pm CST to talk about some art teacherin' issues! Hope you'll join me over here. See you real soon! 

As my fourth graders are wrapping up their Candy Heart Sculptures and drawing, I'm thinking ahead to a fun fibers unit for them. Last year, this group explored embroidery and did a really fabulous job. I know they will love expanding their knowledge and creating these fun stitched monsters!  
I wanted a stitching project that would introduce them to the following: pattern cutting, pinning, sewing, stuffing and embellishing. I also wanted a fun contemporary artist tie-in and I found the artist behind Cotton Monster, Jennifer Strunge, to be perfect. 
Aren't her monsters just the most amazing thing ever? I need one in my life, stat. 

Here's the video I created to introduce my kiddos to Jennifer and all things stitching! Feel free to use it in your art teacherin' world. I think it would be perfect for 3rd grade on up.
We will be using the following supplies:

* 9" X 12" sheet of Smart-Fab or felt
* Additional felt for arms, legs and details
* Tacky glue
* Sharp tapestry needles
* 4 pins per student
* Scissors
* Embroidery floss or crochet thread
* Paper needle threaders

I anticipate this project will take my students 3 one-hour art classes. When I share my video, I show it to the kids in short bursts. I then allow them to go work and set my timer for the amount of time I expect it will take them. When the timer goes off, finished or not, all kids report to the floor for the next video viewing. 
On Day 1, we'll learn about Jennifer Strunge, cut out arms, pin them in place and, hopefully, stitch one side. The following day, we should be able to wrap up the stitching, turn inside out and start working on the face. We will pulling out our Monsters of Creativity collages and looking at those for inspiration! 
Day 3 (and, let's be honesty, probably Day 4) will include gluing the parts of the face down, stuffing and stitching closed. 
I'm thinking of tasking my early finishers to think of themselves as toy creators and their monsters as their creation. As such, they'll need to think of their monster as a product. Who will it be sold to? How will it be packaged? What will be the price? Why should people buy it? I'll keep you posted on this adventure!
Have y'all done stitched monster projects with your students? Love to hear what you've done! And if you do this project, please be sure and let me know, I'd love to see your student's creations. 
 photo signature_zpsd10b3273.png

Tuesday, April 11, 2017

Exciting News: Free Clay Workshop!

I have got to be honest with y'all: I am LOVING our Wednesday night craft nights! If you aren't familiar, I've been hosting a free felting workshop over on my Facebook page each Wednesday at 8pm CST during the month of April (in fact, if you are joining in the fun tomorrow night, I'll have a list of supplies needed below). You are ALWAYS welcome to join, even if you do not have the felting kit. That was simply created with the help of Sue at Back to Back Fiber. And, if you decide you do want to join, you can still pick up your kit from Sue. All of my LIVE chats are archived both on my Facebook page and on my YouTube channel. Remember: I would LOVE to share what you create right here. Just use the hashtag #creatingwithcassie when you share your work on your preferred social media outlet. 

So now on to the exciting news: I'm going to continue the craft night fun with Clay in the month of May! I've partnered up with Activa Products to create a kit just for you and our creative evenings. Here's what your kit will include:
 A 1lbs. box of Celluclay, a 1lbs. box of ActivClay and 4" X 180" of Rigid Wrap which can all be purchased here. Knowing that we art teachers love a bargain, Activa is offering us a very special rate. I want to throw a big shout out to them for working with me! I know I've shared this before...I am not making a profit from these craft nights. I am doing them simply because I find creating, teaching and spending time with y'all so much fun. Thank you for joining me on this adventure. Remember, you do not have to make a purchase to participate in this free Clay in the month of May workshop. These are simply the supplies I will be using if you want to create along with me. You might have heard me mention both Celluclay and Rigid Wrap before. Here's a peak at some projects I've done with both materials:
This was my first experience with Celluclay and I was HOOKED after creating these vintage-inspired treat buckets!
Maybe too many episodes of Walking Dead was the inspo behind my Zombie Head Planters
Obviously, I'm a fan of the Halloween. This Book of Spells was big fun! 
I also introduced my second graders to Celluclay with this project
I shared Rigid Wrap with my fourth graders when they created these Candy Heart Sculptures

This is the perfect opportunity for you to explore new sculpture materials before introducing them to your students. If you are without a kiln, these materials are just the thing as they don't require kiln fire. I became very familiar with Activa Products when writing this here clay book of mine
My book is currently available for preorder here and slated to come out early June (I previously said mid-May but that release date has changed). In this book, I work with a variety of air dry, polymer and handmade clays. Once you are done with our 5 Wednesdays of clay exploration, you'll be ready to dive into this book and bring the fun to your art room next fall. 

As for this Wednesday, we'll be Wet Felting. So bring a zip lock bag (whatever size you have handy), a bowl of warm water, a bar or pump soap and scissors. Can't wait to create with you!
 photo signature_zpsd10b3273.png

Sunday, October 1, 2017

DIY: Top Ten Spooky Ensembles!

Happy October 1st, guys and gals! I'm SO EXCITED that my favorite month which is also home to my favorite holiday is FINALLY here! I've been sharing my favorite DIY's for the season as well as my favorite art projects for kids...and today I'm sharing my TOP TEN SPOOKY ENSEMBLES! Can you tell I'm excited based on my excessive use of the caps lock and the exclamation points? Sorry, I just can't control myself. 
But before I go any further, I have some super spooky and fun news to share with you: I've been chosen by Treetopia to one of their 2017 Halloween Queens! What does that mean? Well, that they sent me a CANDY CORN CHRISTMAS TREE which I've just spent the last 48 hours crafting and decorating. And you'll be able to catch a sneak peek right here tomorrow on October 9th. I'm so excited to also share that I'll be hosting a HUGE giveaway then. Ya'll won't wanna miss this!
I will admit, I'm mighty nervous...I mean, check out this line up! If you are not familiar with these DIY rock stars, then hop on over to  their blogs! BriteandBubbly is an ABSOLUTE DOLL, y'all have to check out her blog. 100directions blogger Jen is a girl after my own heart: her blog really is going in 100 directions and I love them all! Chloe at CelebrateandDecorate has such a fun and colorful blog that I cannot wait to explore more. If y'all are looking for some fun DIY's for yourself to create for your home, Natalie at Natalme has some amazing ideas. CraftyLumberJacks is AMAZING...I just got lost exploring their blog and all of their amazing ideas for Halloween. JenniferPerkins is where I get so much inspirations...she's a girl after my own heart with her love of anything vintage, weird, colorful and...well, weird. I'm thrilled to be in such good company!

So be sure to pop back by tomorrow  on October 9th for some fun news! Until then...let's talk Spook-tastic Ensembles!
Zombie Dress! I found this amazing Walking Dead-esque fabric at Joann's last season and knew I had to make a dress! I wore it to Halloween Horror Nights at Universal Studios. Mitch snapped the photo...knowing full well that there was a psychotic chain saw gal with great hair creepin' up behind me. More details on the fabric and the dress pattern used right here
Needle Felted Haunted Mansion Eyeball Pants! Okay, I know that's a lengthy description but that's exactly what these bad boys are. I found the stretchy pants at Target and knew right away that they'd make the perfect Haunted Mansion pants...as the print reminded me of the creepy-eyeball wall paper at the place. The Haunted Mansion at Disney is one of my most favorite things ever. I was so excited to create these pants. And, PANTS! I never wear 'em. In fact, I have three pairs and this is one of them. More details here. 
El Dia de los Muertos Dress! I've actually made a couple...I love all things Day of the Dead. These planters were super fun to paint as well. I'm excited to wear this dress this year. But I'm on a heels boycott so, sadly, I won't be wearing the dress with those super cute heels! More dress and planter details here
Monster Mash Dress! I think one of the reasons I love Halloween so much is because of the music. It's like Christmas music in that we listen to the same songs every year...and they bring back so many fun memories. Monster Mash makes me think of bobbing for apples, trick or treatin' and wearing our costumes to school. This fabric inspired me so much, I needle felted a matching sweater! More here
Classic Horror Movies Dress! The classic Universal Studios horror movies are my favorite thing ever. Well, maybe not the movies so much as just looking at the posters, the movie stills and photos Boris Karloff getting into so many amazingly spooky characters. This fabric is some of my favorite and I always get stopped when wearing this dress. You can read about it right here
The Scream! Granted, this dress wasn't intended to be a Halloween dress, but I'm gonna stretch and say that it qualifies as Munch's the Scream is spooky as all get out. Not to mention, despite the fact that this dress is sleeveless, it's COMPLETELY made of felted wool on the front thereby making it the hottest sleeveless dress in history. It's been confirmed. Read all about it here
Another el Dia de los Muertos Dress! I had a lot of fun adding the colorful pompoms to the bottom of this dress. I'm telling you, seeing the colorful art of this holiday makes me so happy. I wish I had more of it in my home! For now, I'll have to settle on this here dress. Read all about it here. 
Black Cat! I knew as soon as I spotted this curtain fabric at IKEA that it was coming home with me and becoming a dress. I now am ruined for fabric because of this dress...because now all I wanna sew with is big and bold print (preferably from IKEA because it's so incredibly inexpensive!). More about this cat-astic dress here.
 Naughty Kitty Club Jacket! Okay, so one could argue that this is not Halloween specific but I disagree. If you know your vintage Halloween cat decorations (what?! You don't!? Shame on you!) then you'll recognize this cat. He's the one on most vintage Halloween decor. I loved him so much, I decided to needle felt him onto the back of this cheapo jacket. More here. 
Spooky Owl Sweater! Have you noticed a trend? In the fall, I LOVE to get back into needle felting! Every season, I return to it and don't stop stabbing stuff (ahem) until spring. I'm excited to get back into needle felting soon...just don't know what I'll be up to yet! More about this simple project here.
 Now y'all have a super start to the best month ever! AND remember to pop back by here tomorrow for a HUGE giveaway and some exciting fun-ness to share. Until then!
 photo signature_zpsd10b3273.png